Start With Testomat.io
Welcome!
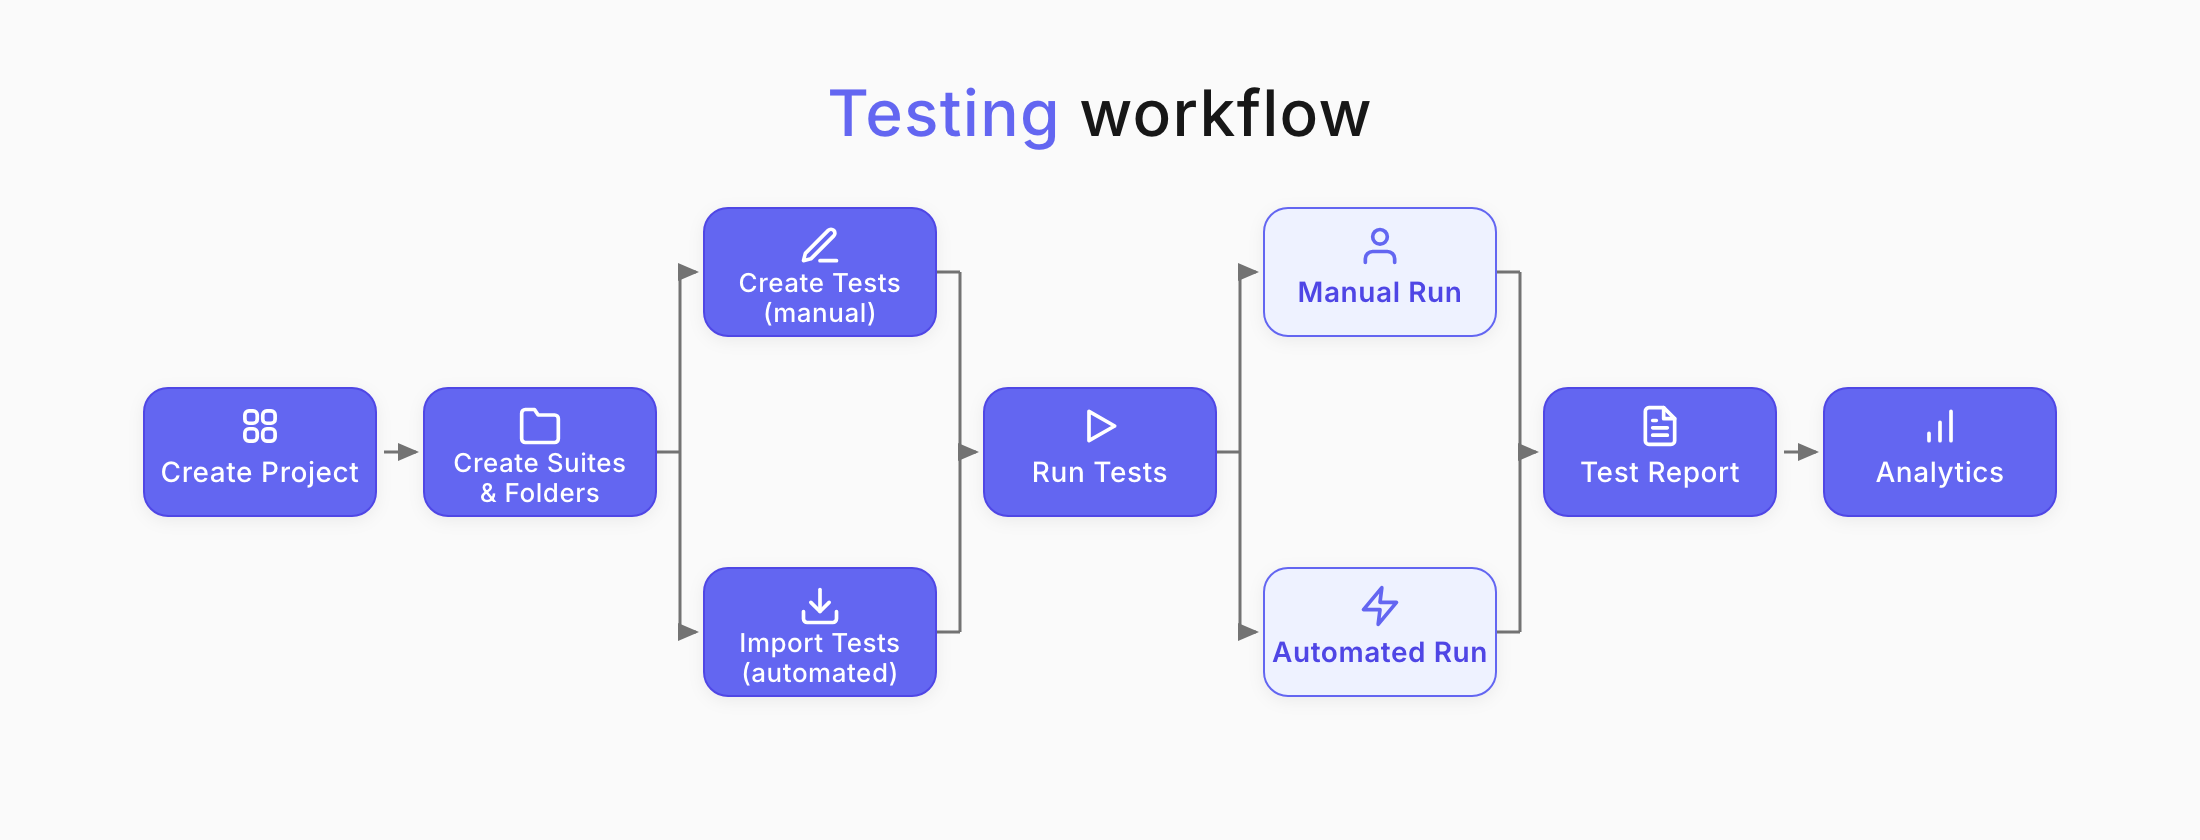
This step-by-step guide helps you to create your project, add tests, execute them, and review results with analytics.
By the end of this guide, you will have:
- a project
- suites/folders with suites
- tests
- runs
- a report
- visual analytics with all data
Create Project
Section titled “Create Project”A project is the main entity in Testomat.io that contains all tests, test execution programs, and analytical data on them. Every project can contain any number of suites and folders with any amount of tests, test runs, plans, and reports in them.
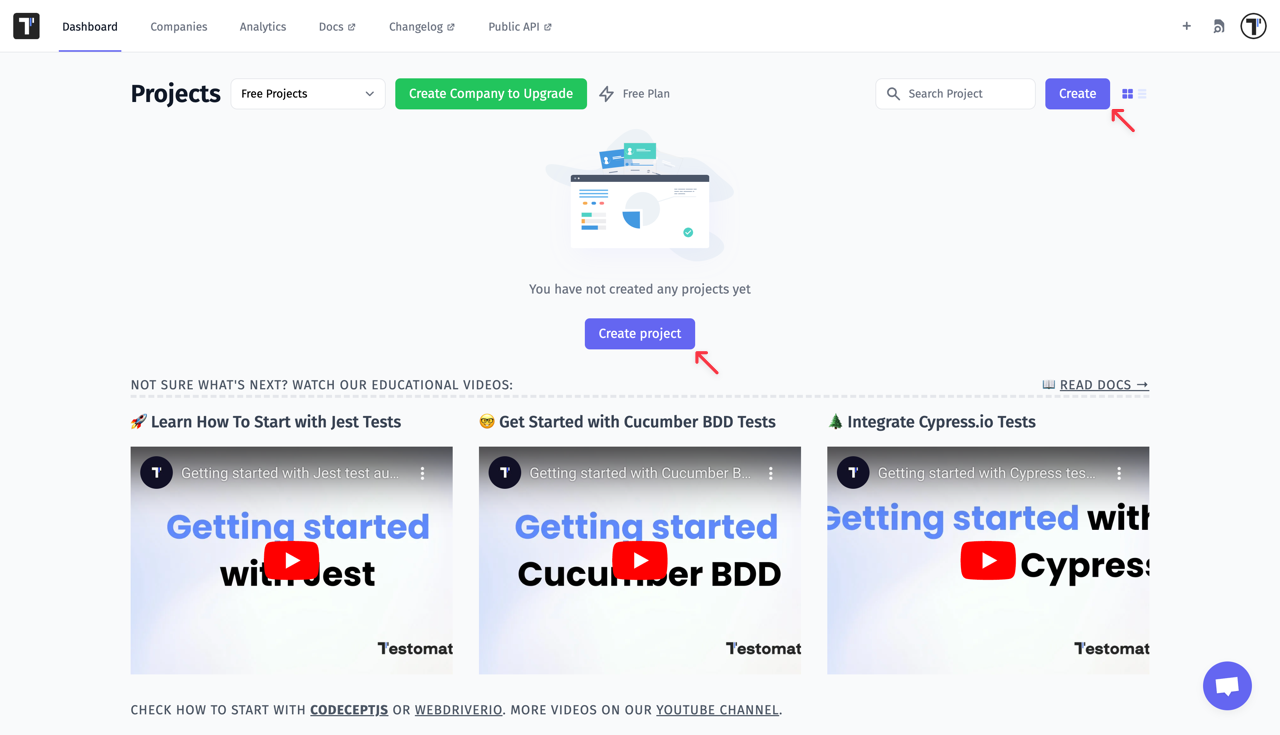
Register at app.testomat.io and activate your user account. Then create a new project:
- Go to your account Dashboard.
- In the top-right corner, click Create.
- Enter the project title.
- Choose the project type:
- BDD Project
- Classical Project
- Decide whether to use demo data or your own data.
- Click Create.
Use BDD Project if you plan to work with BDD descriptions or the Cucumber framework.
Use Classical Project if you want free-form markdown test cases with automation synced to test cases.
You have just created your first project!
Now you can start creating suites and test cases for your projects.
Create a Suite
Section titled “Create a Suite”Test suite is a collection of tests grouped together. You can create suites or create a folder with suites.
![]()
To create a suite:
- Select a project.
- Click New suite.
- Enter your Suite name.
- Press
Enteron your keyboard.
Another way to create suite:
- Click action menu button (…).
- Select Create more suites from the menu.
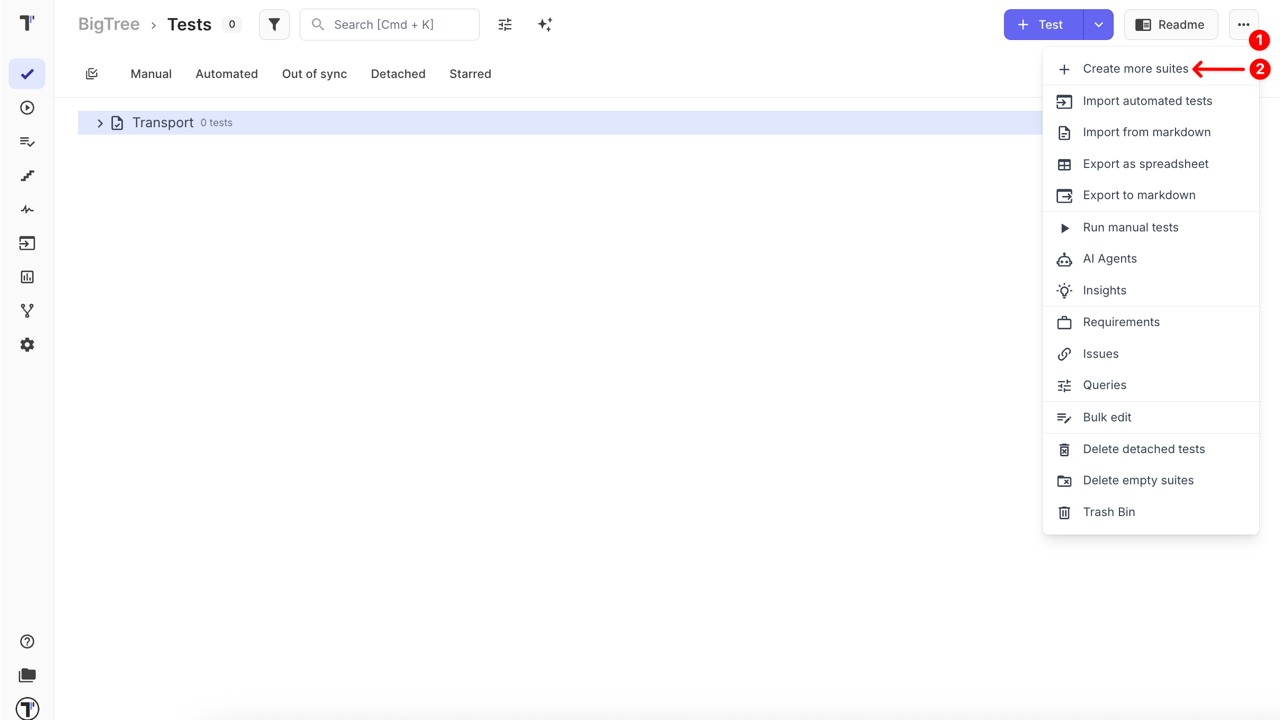
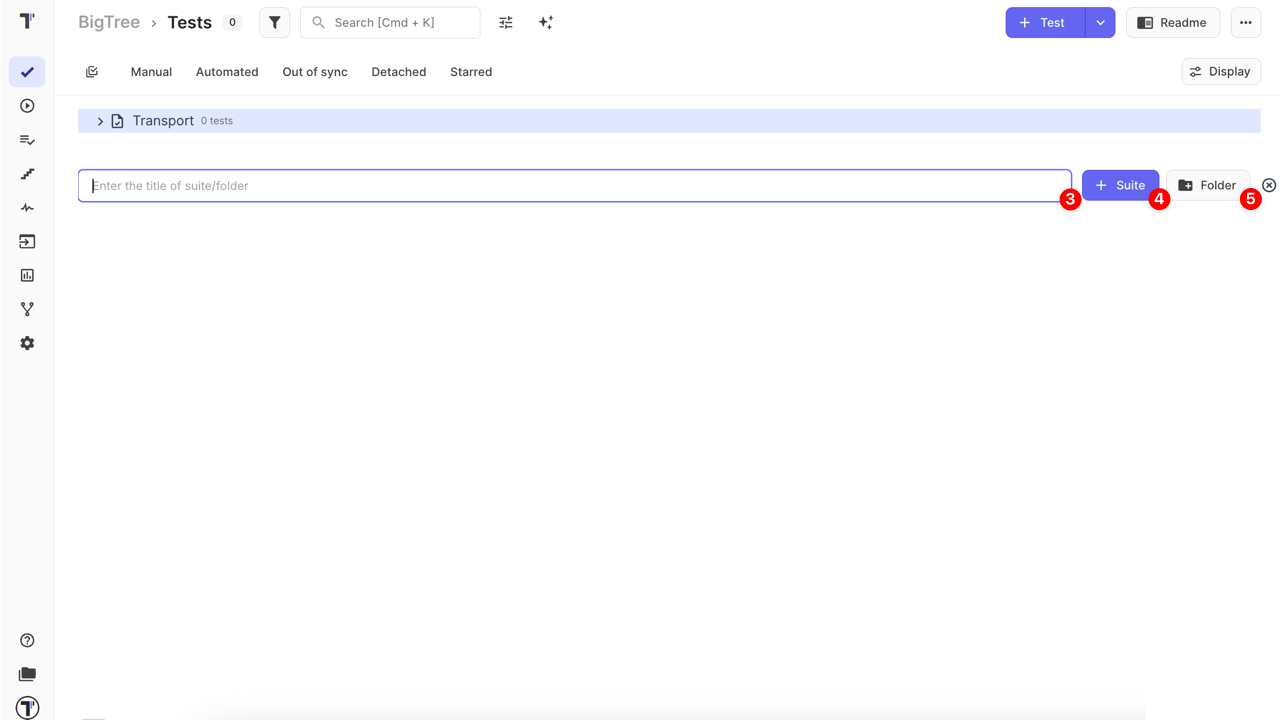
- Enter the title of the new suite or folder.
- Click ’+ Suite’ to create a test suite, or optionally
- Click ‘Folder’ to create a folder for grouping suites.
Create Manual Test Cases
Section titled “Create Manual Test Cases”Read full article: Test Case Creation and Editing.
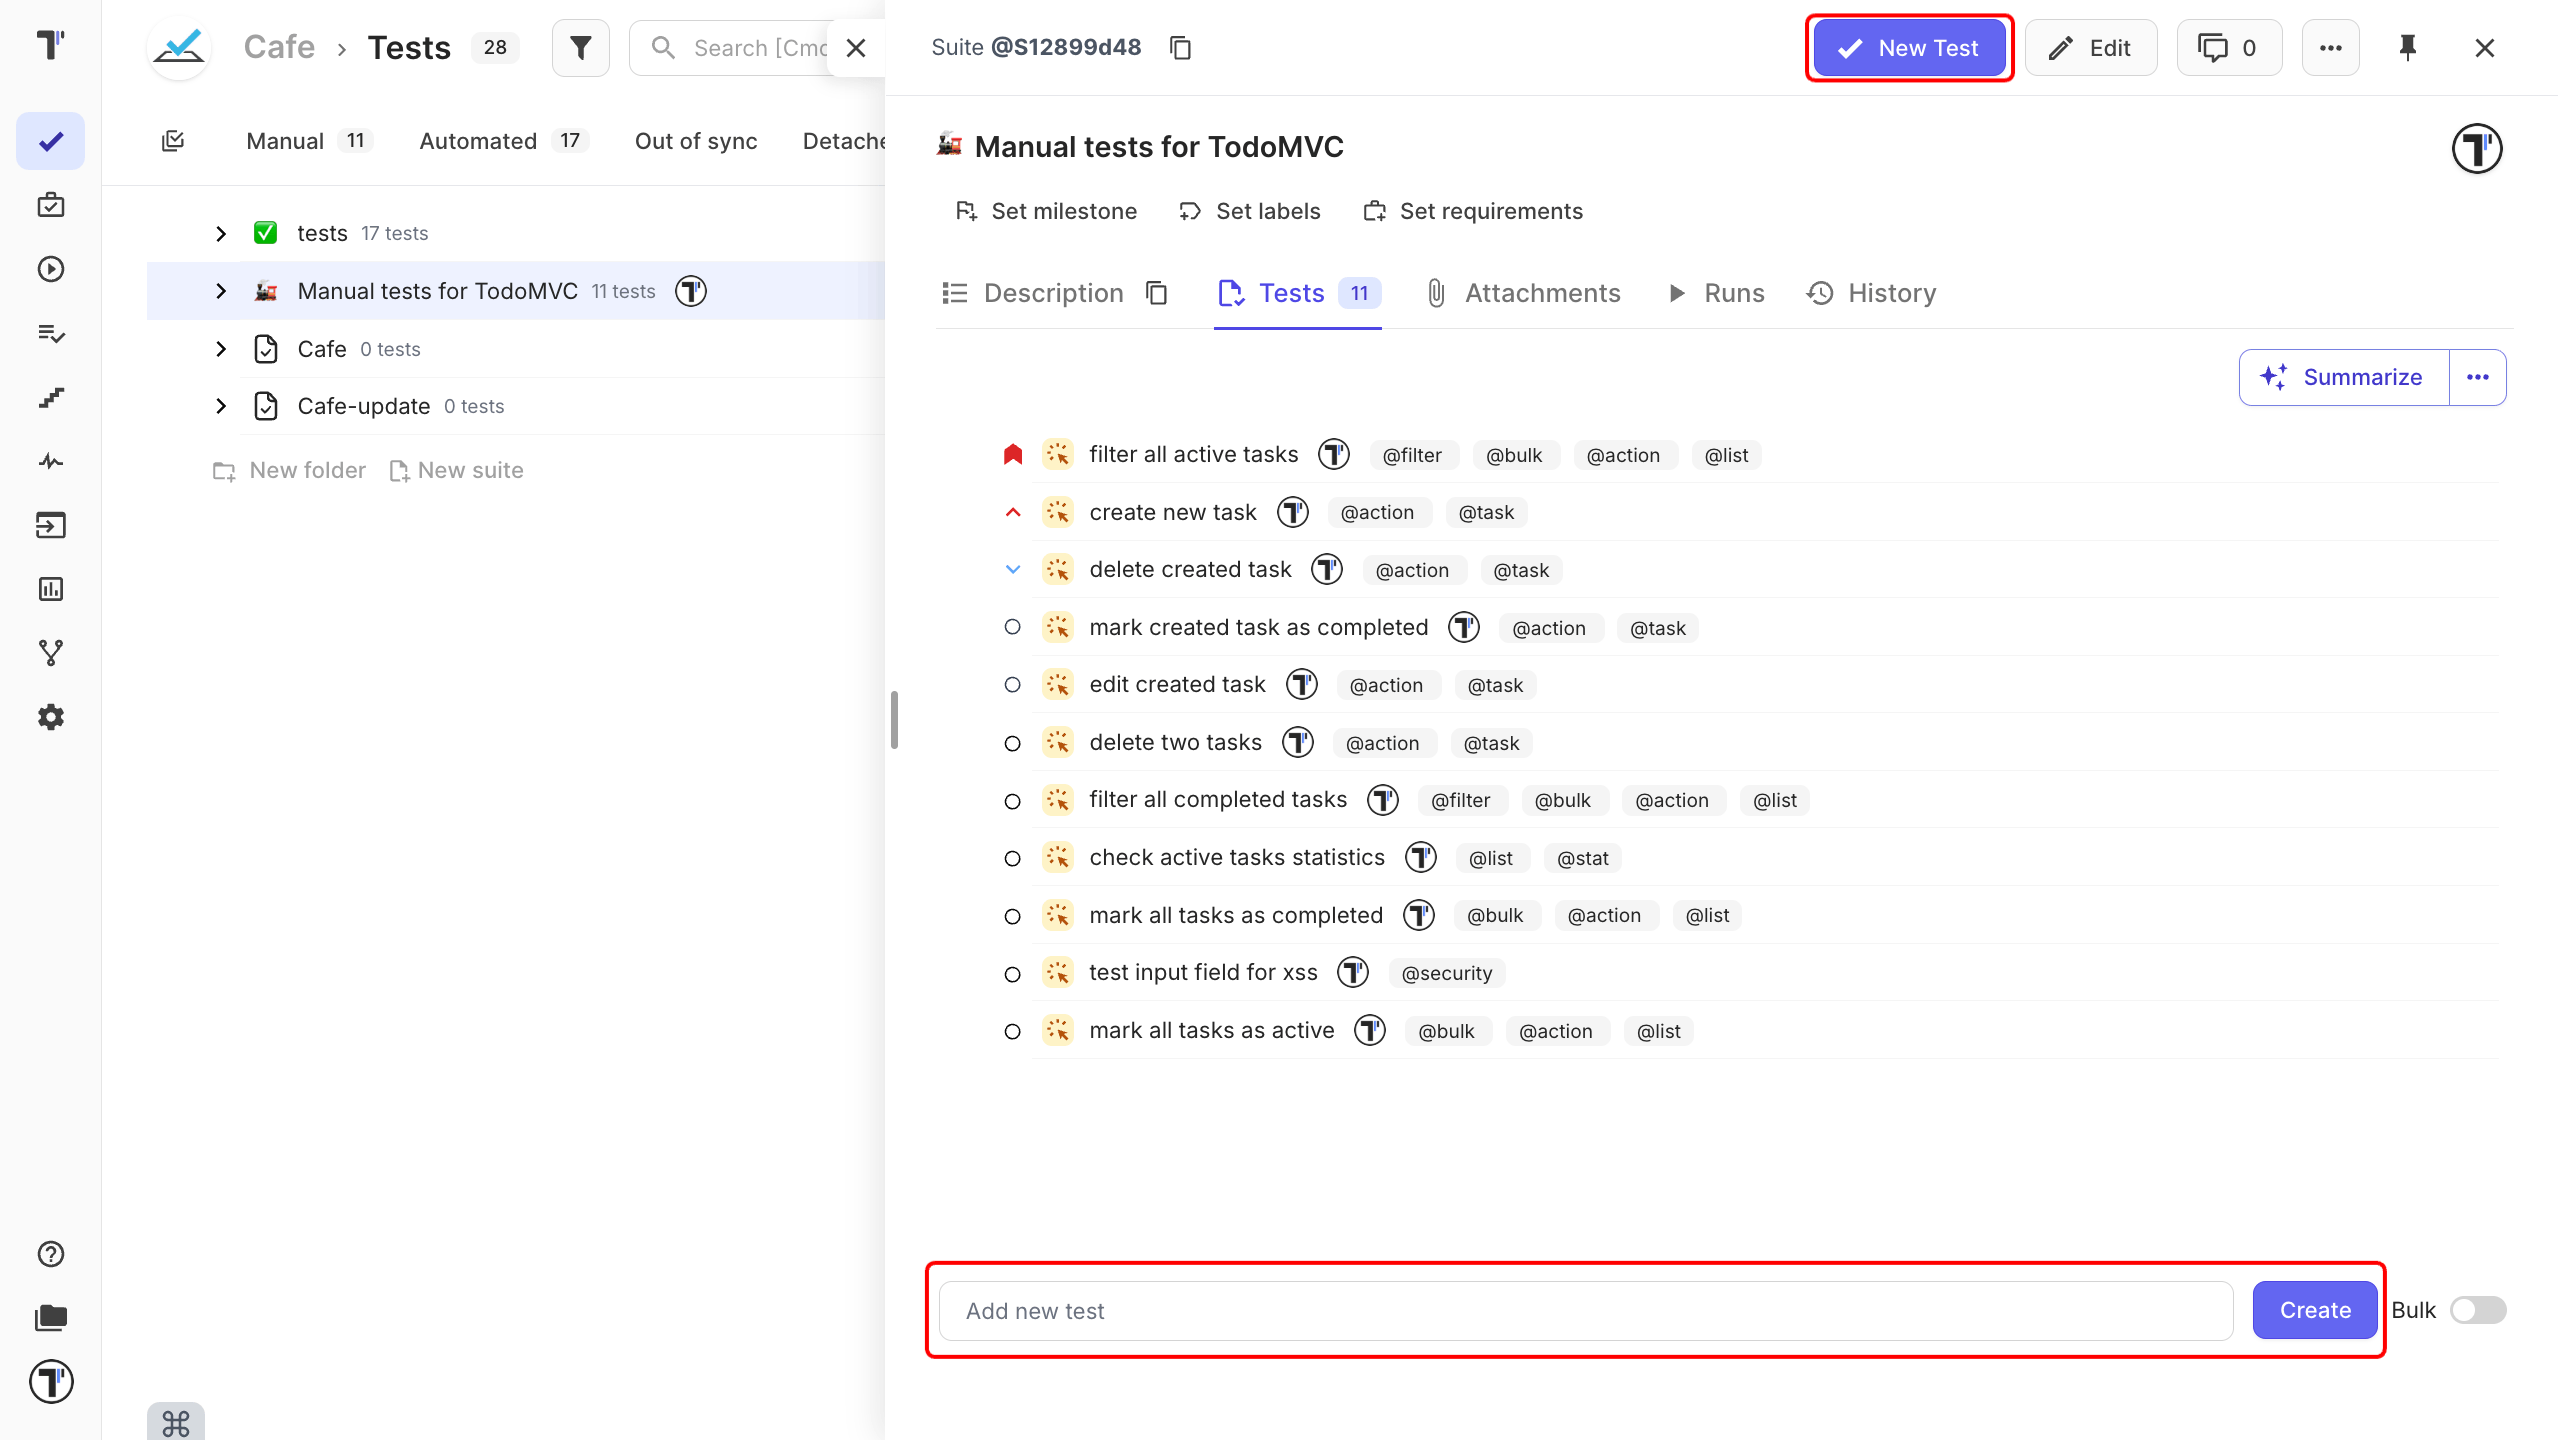
After you’ve created test suites, you can start adding tests.
- Select a test suite.
- Click on Suite, and a Suite panel will open to the right.
- At the bottom of the Tests tab, enter the name of the test.
- Click Create.
- Click on the test to edit it.
You can also create a test using the New test button at the top of the Suite editor panel.
Bulk-create Tests
Section titled “Bulk-create Tests”Read full article: Bulk Edit.
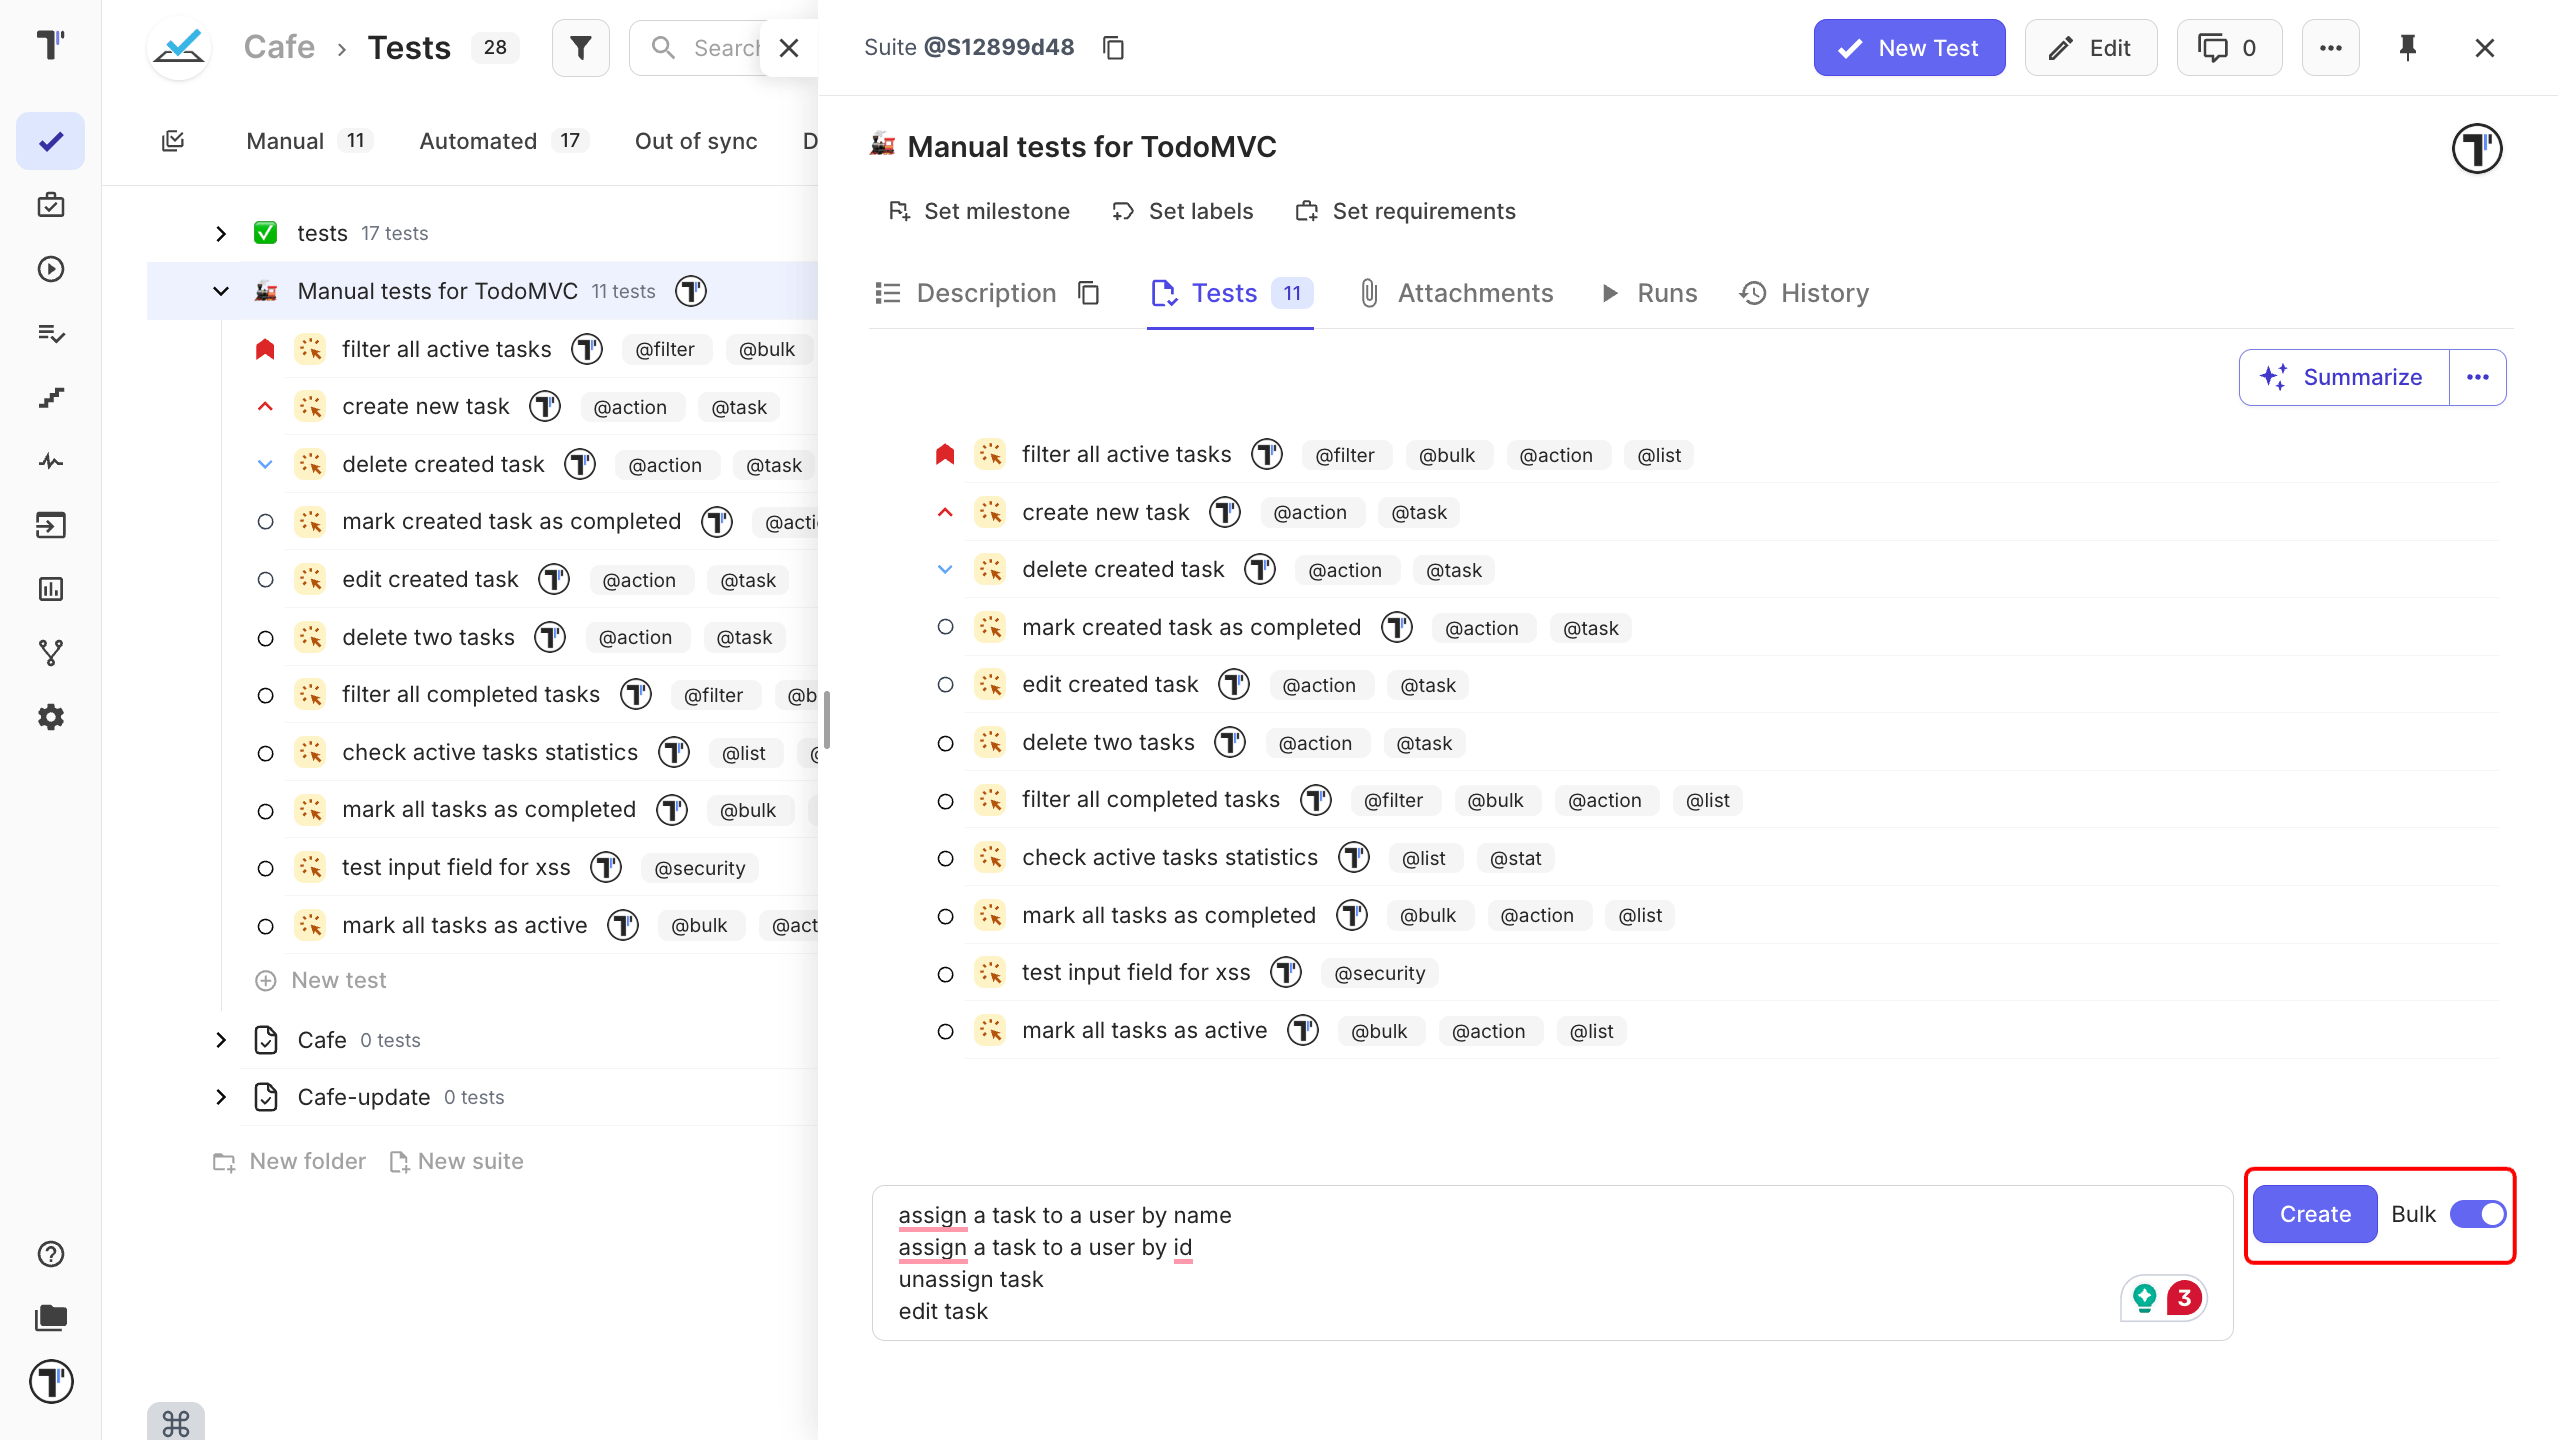
To add multiple tests at once by listing their names, rather than adding each one individually:
- Open (or create) a suite.
- Turn on the Bulk toggle.
- Type one test name per line in the input field.
- Click Create - every line becomes a separate test, all added together.
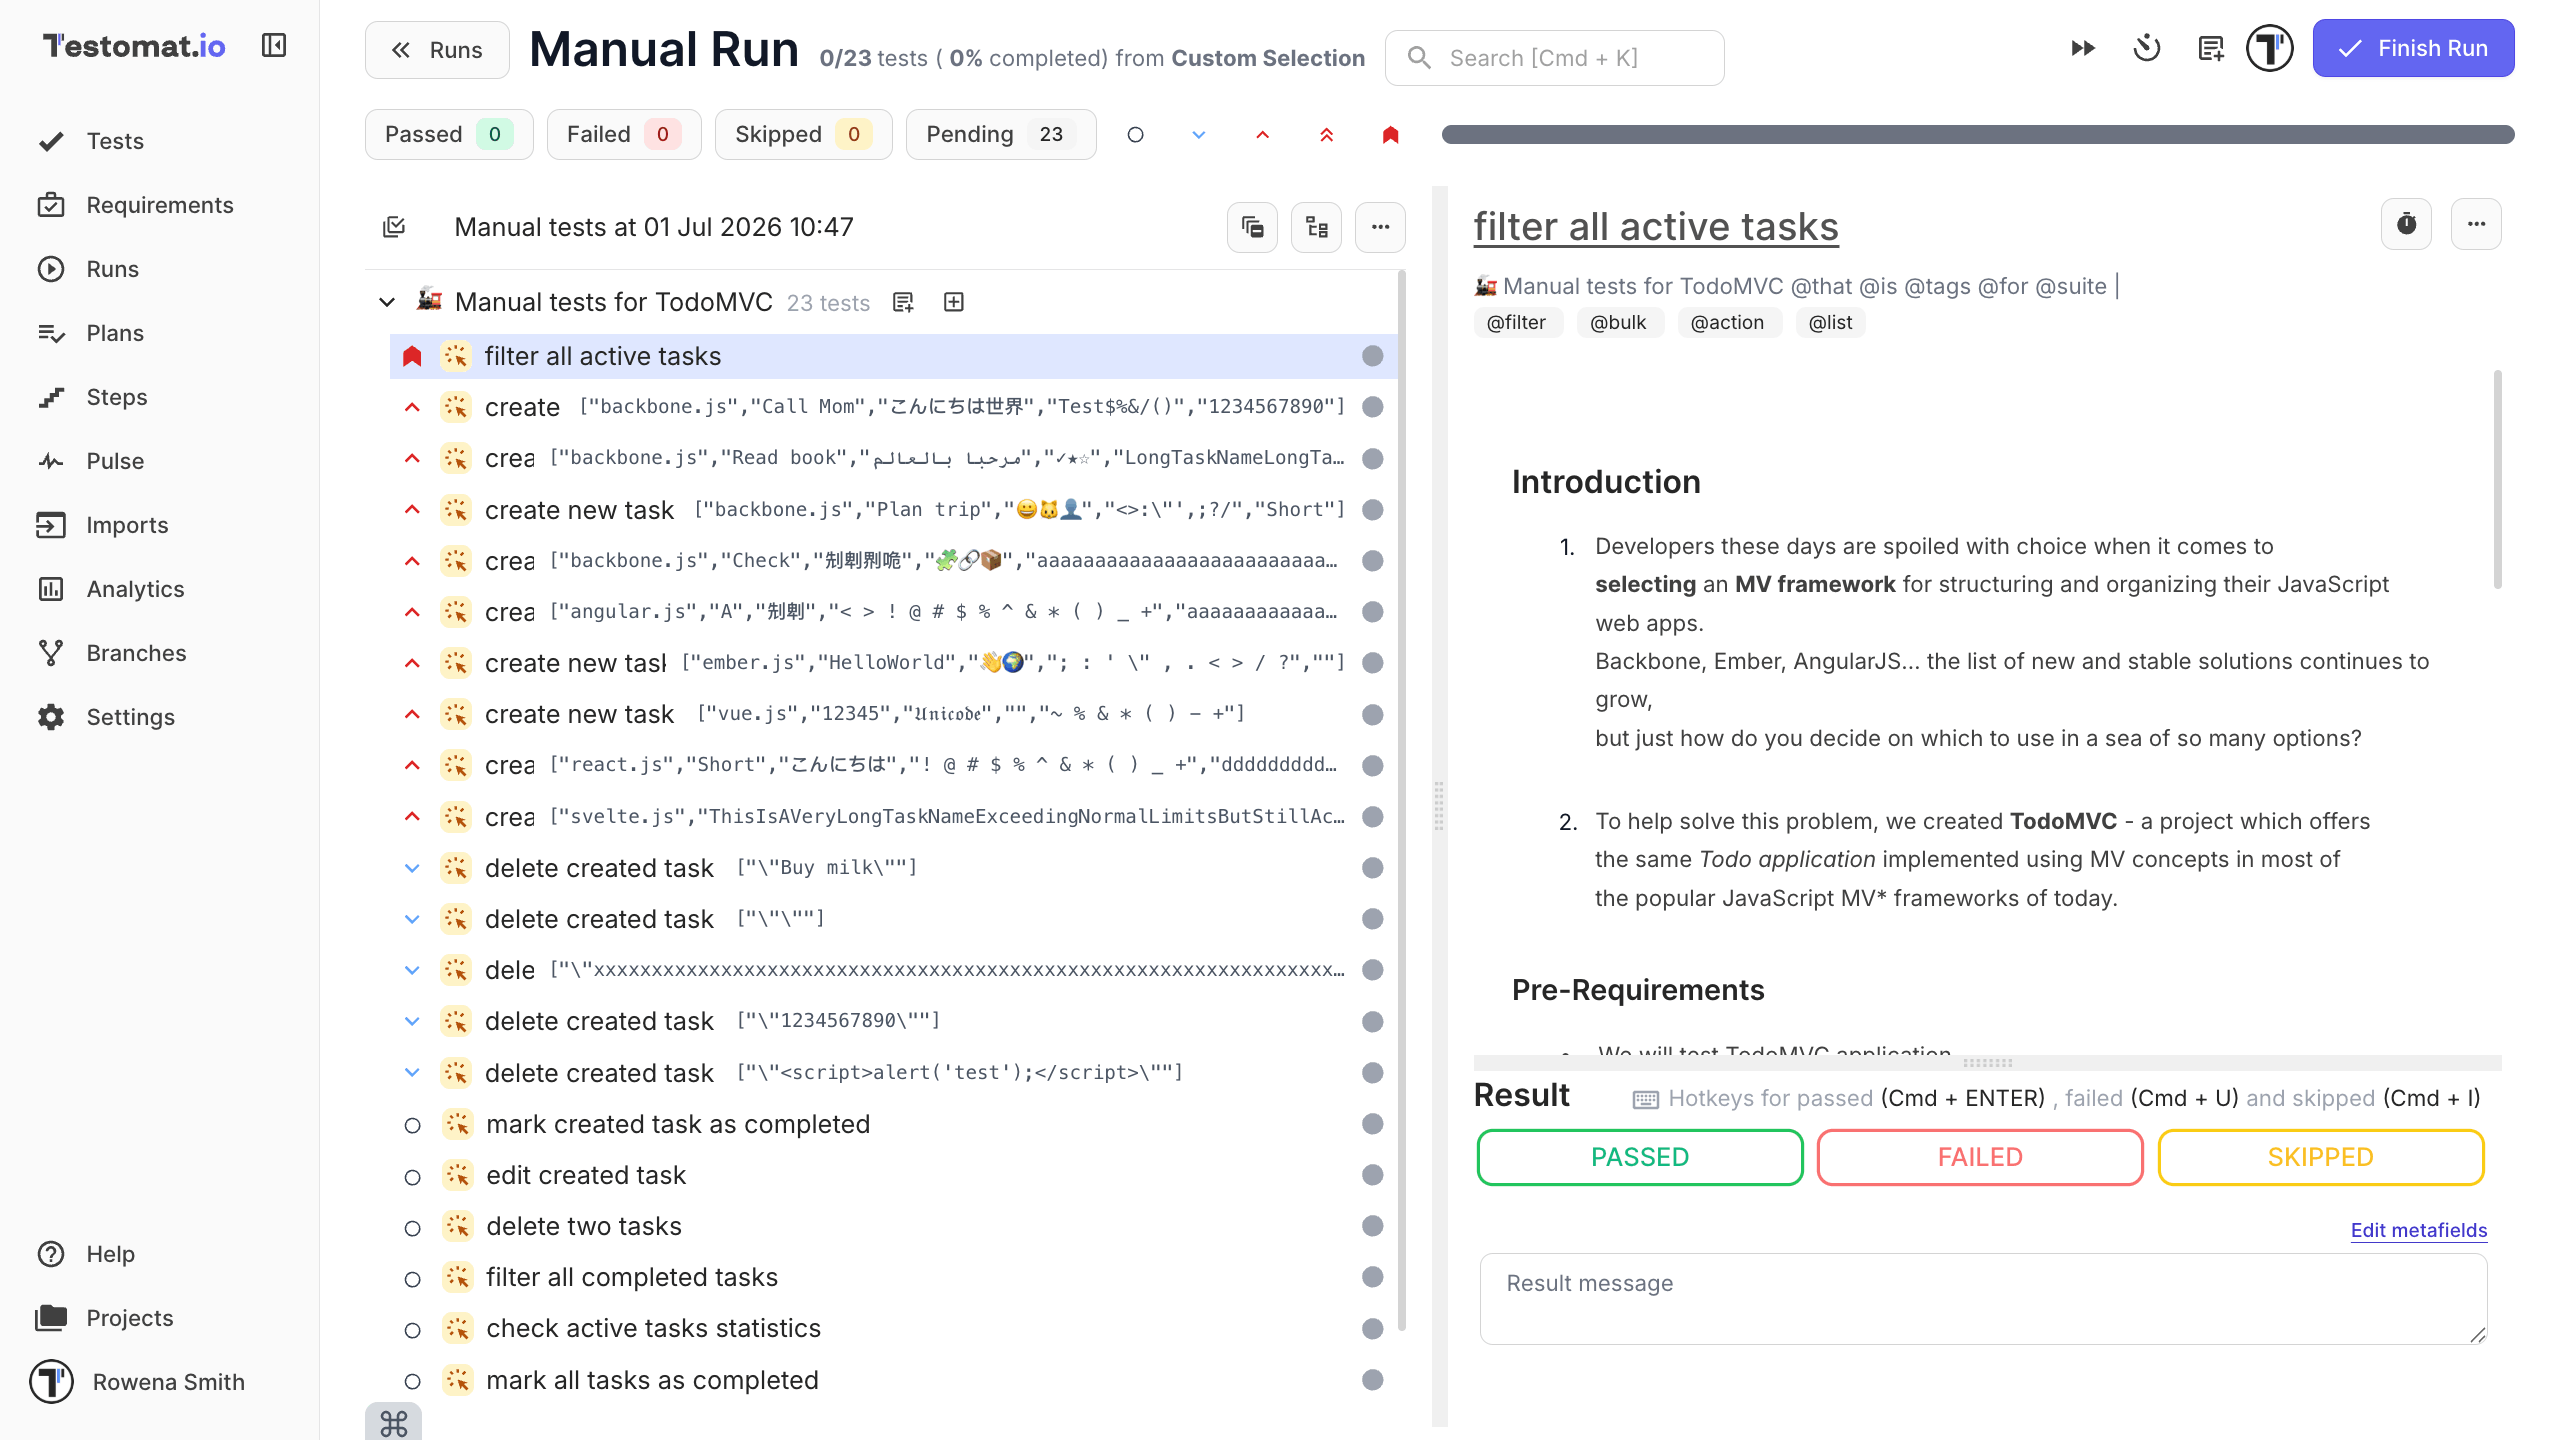
Run Manual Tests
Section titled “Run Manual Tests”Read full article: Running Tests Manually.
There are two main ways to start a manual run:
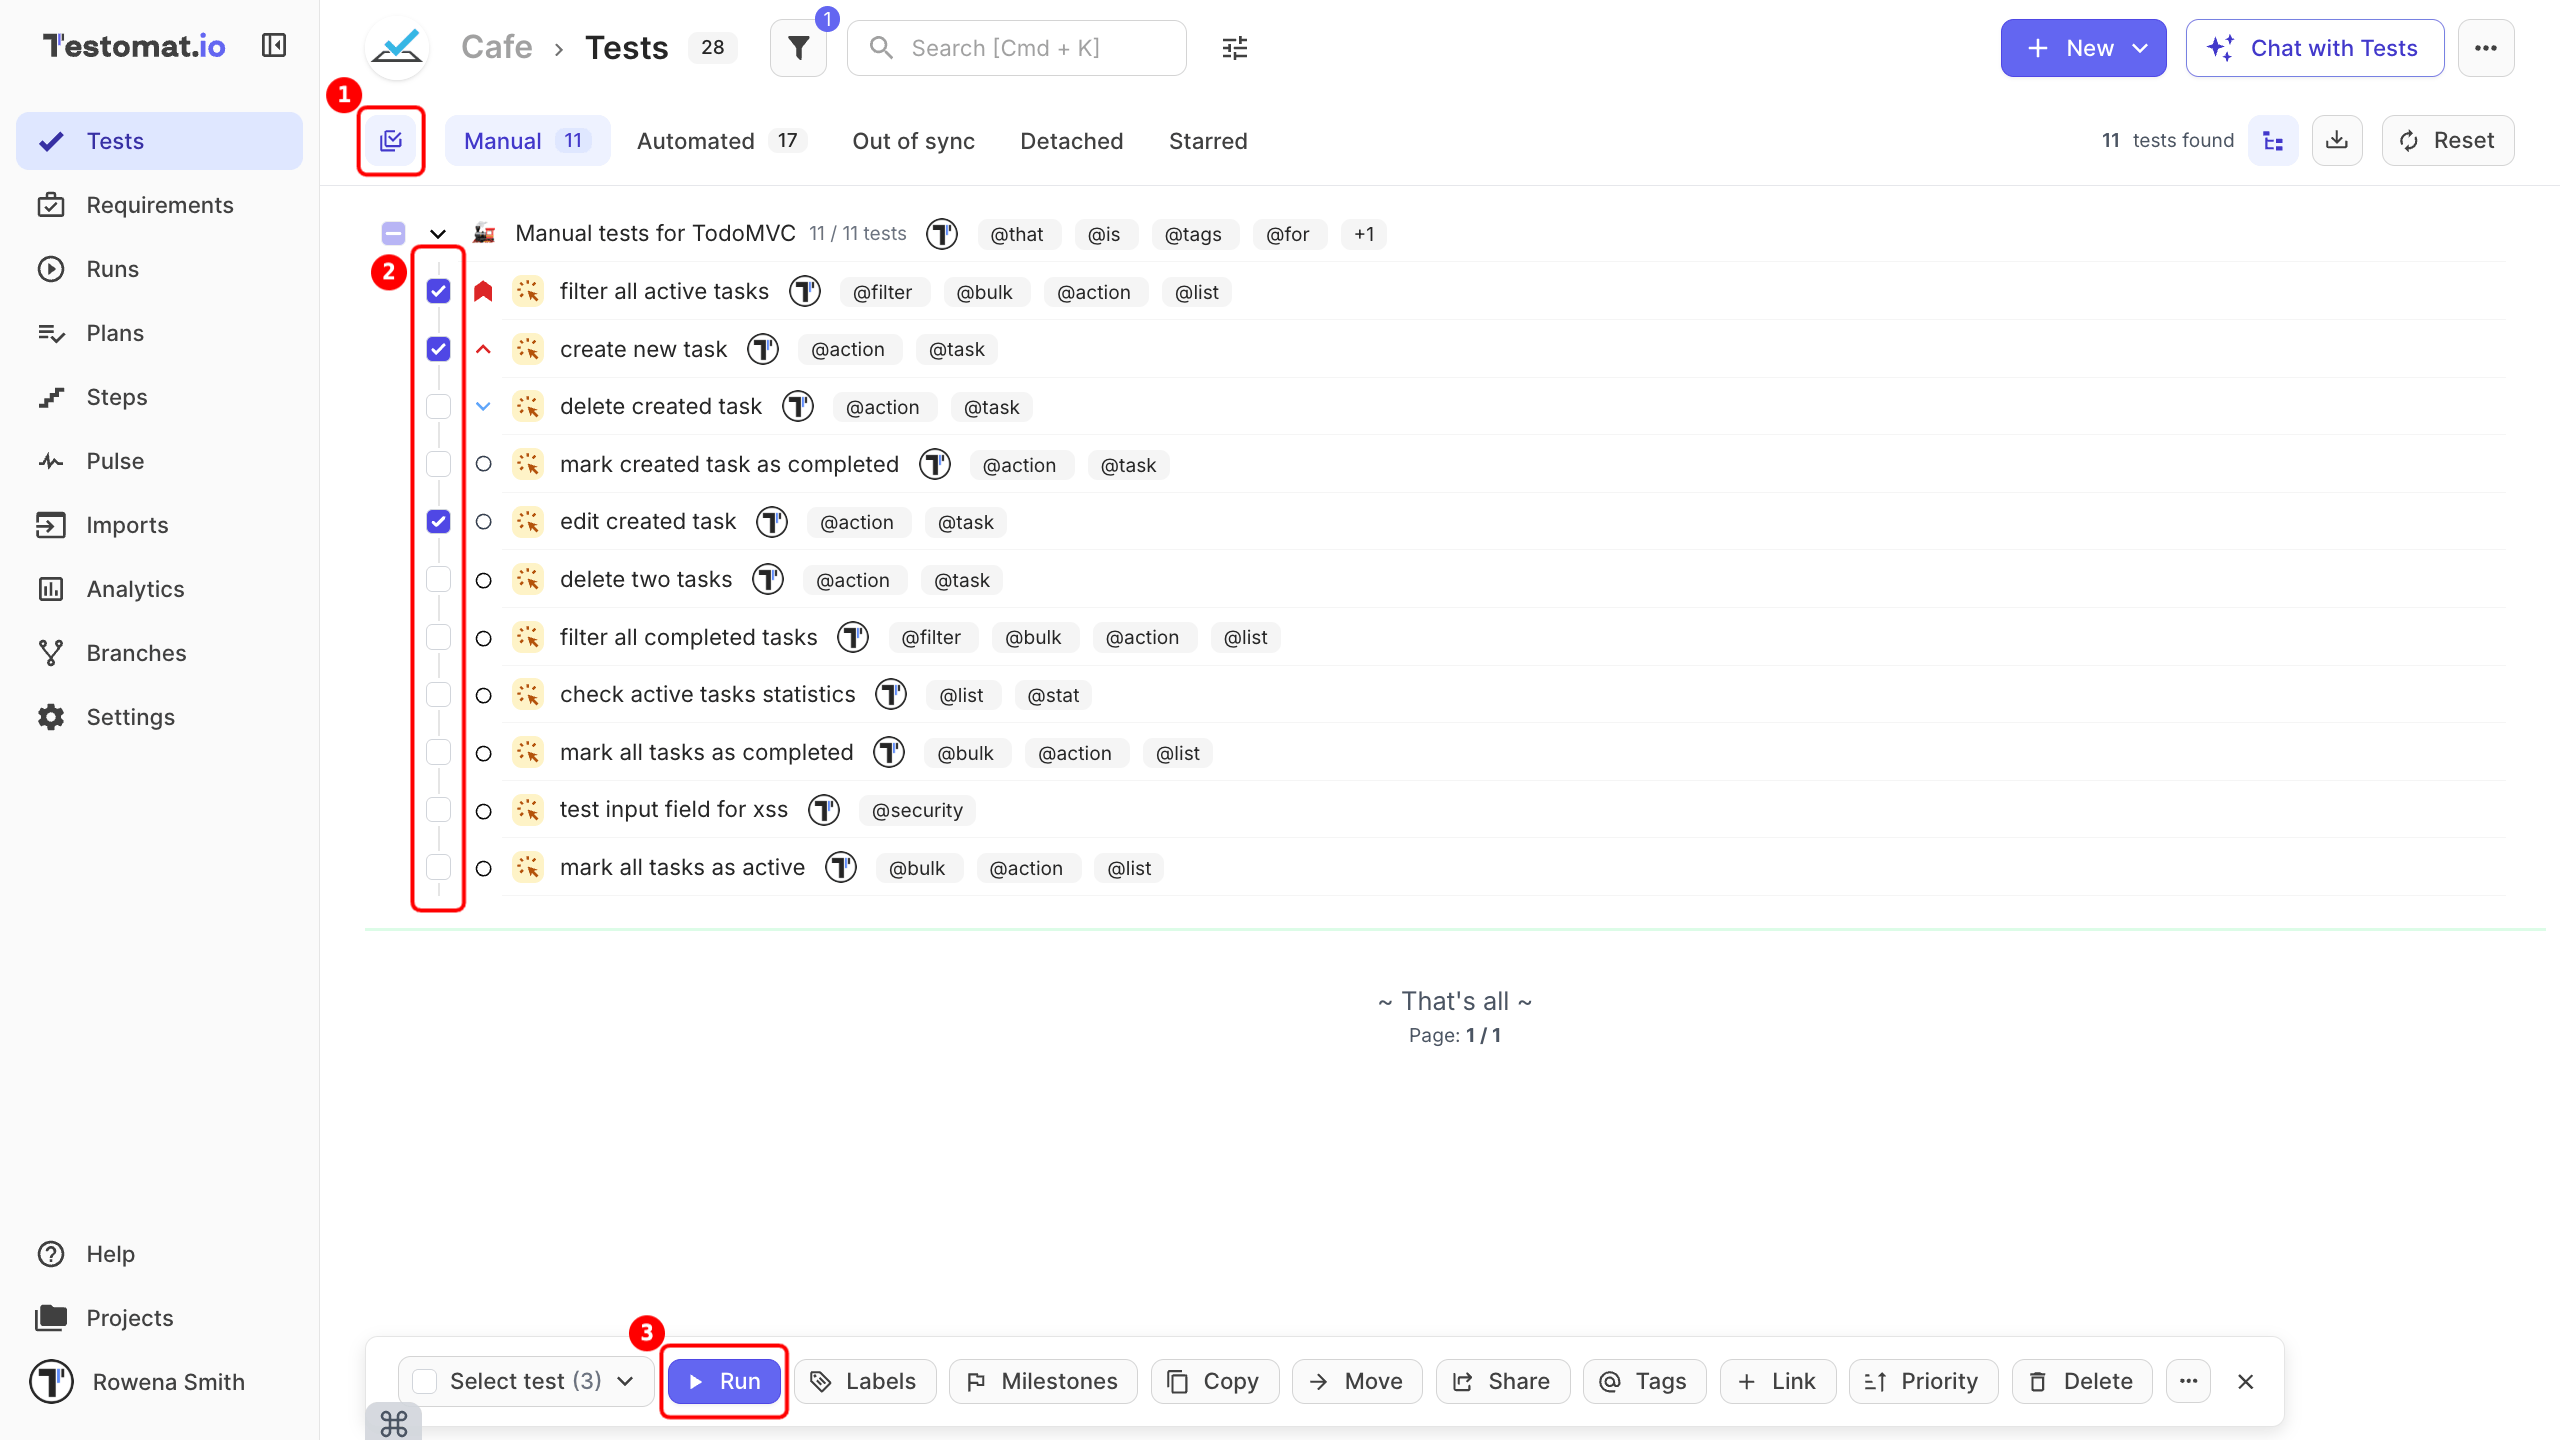
From the ‘Tests’ page, quick launch for selected tests or suites, or adding tests to an already ongoing run without leaving the Tests view.
- On the Tests sidebar tab, activate Multi-select.
- Select tests you need to run.
- Click the Run button in the actions menu below.
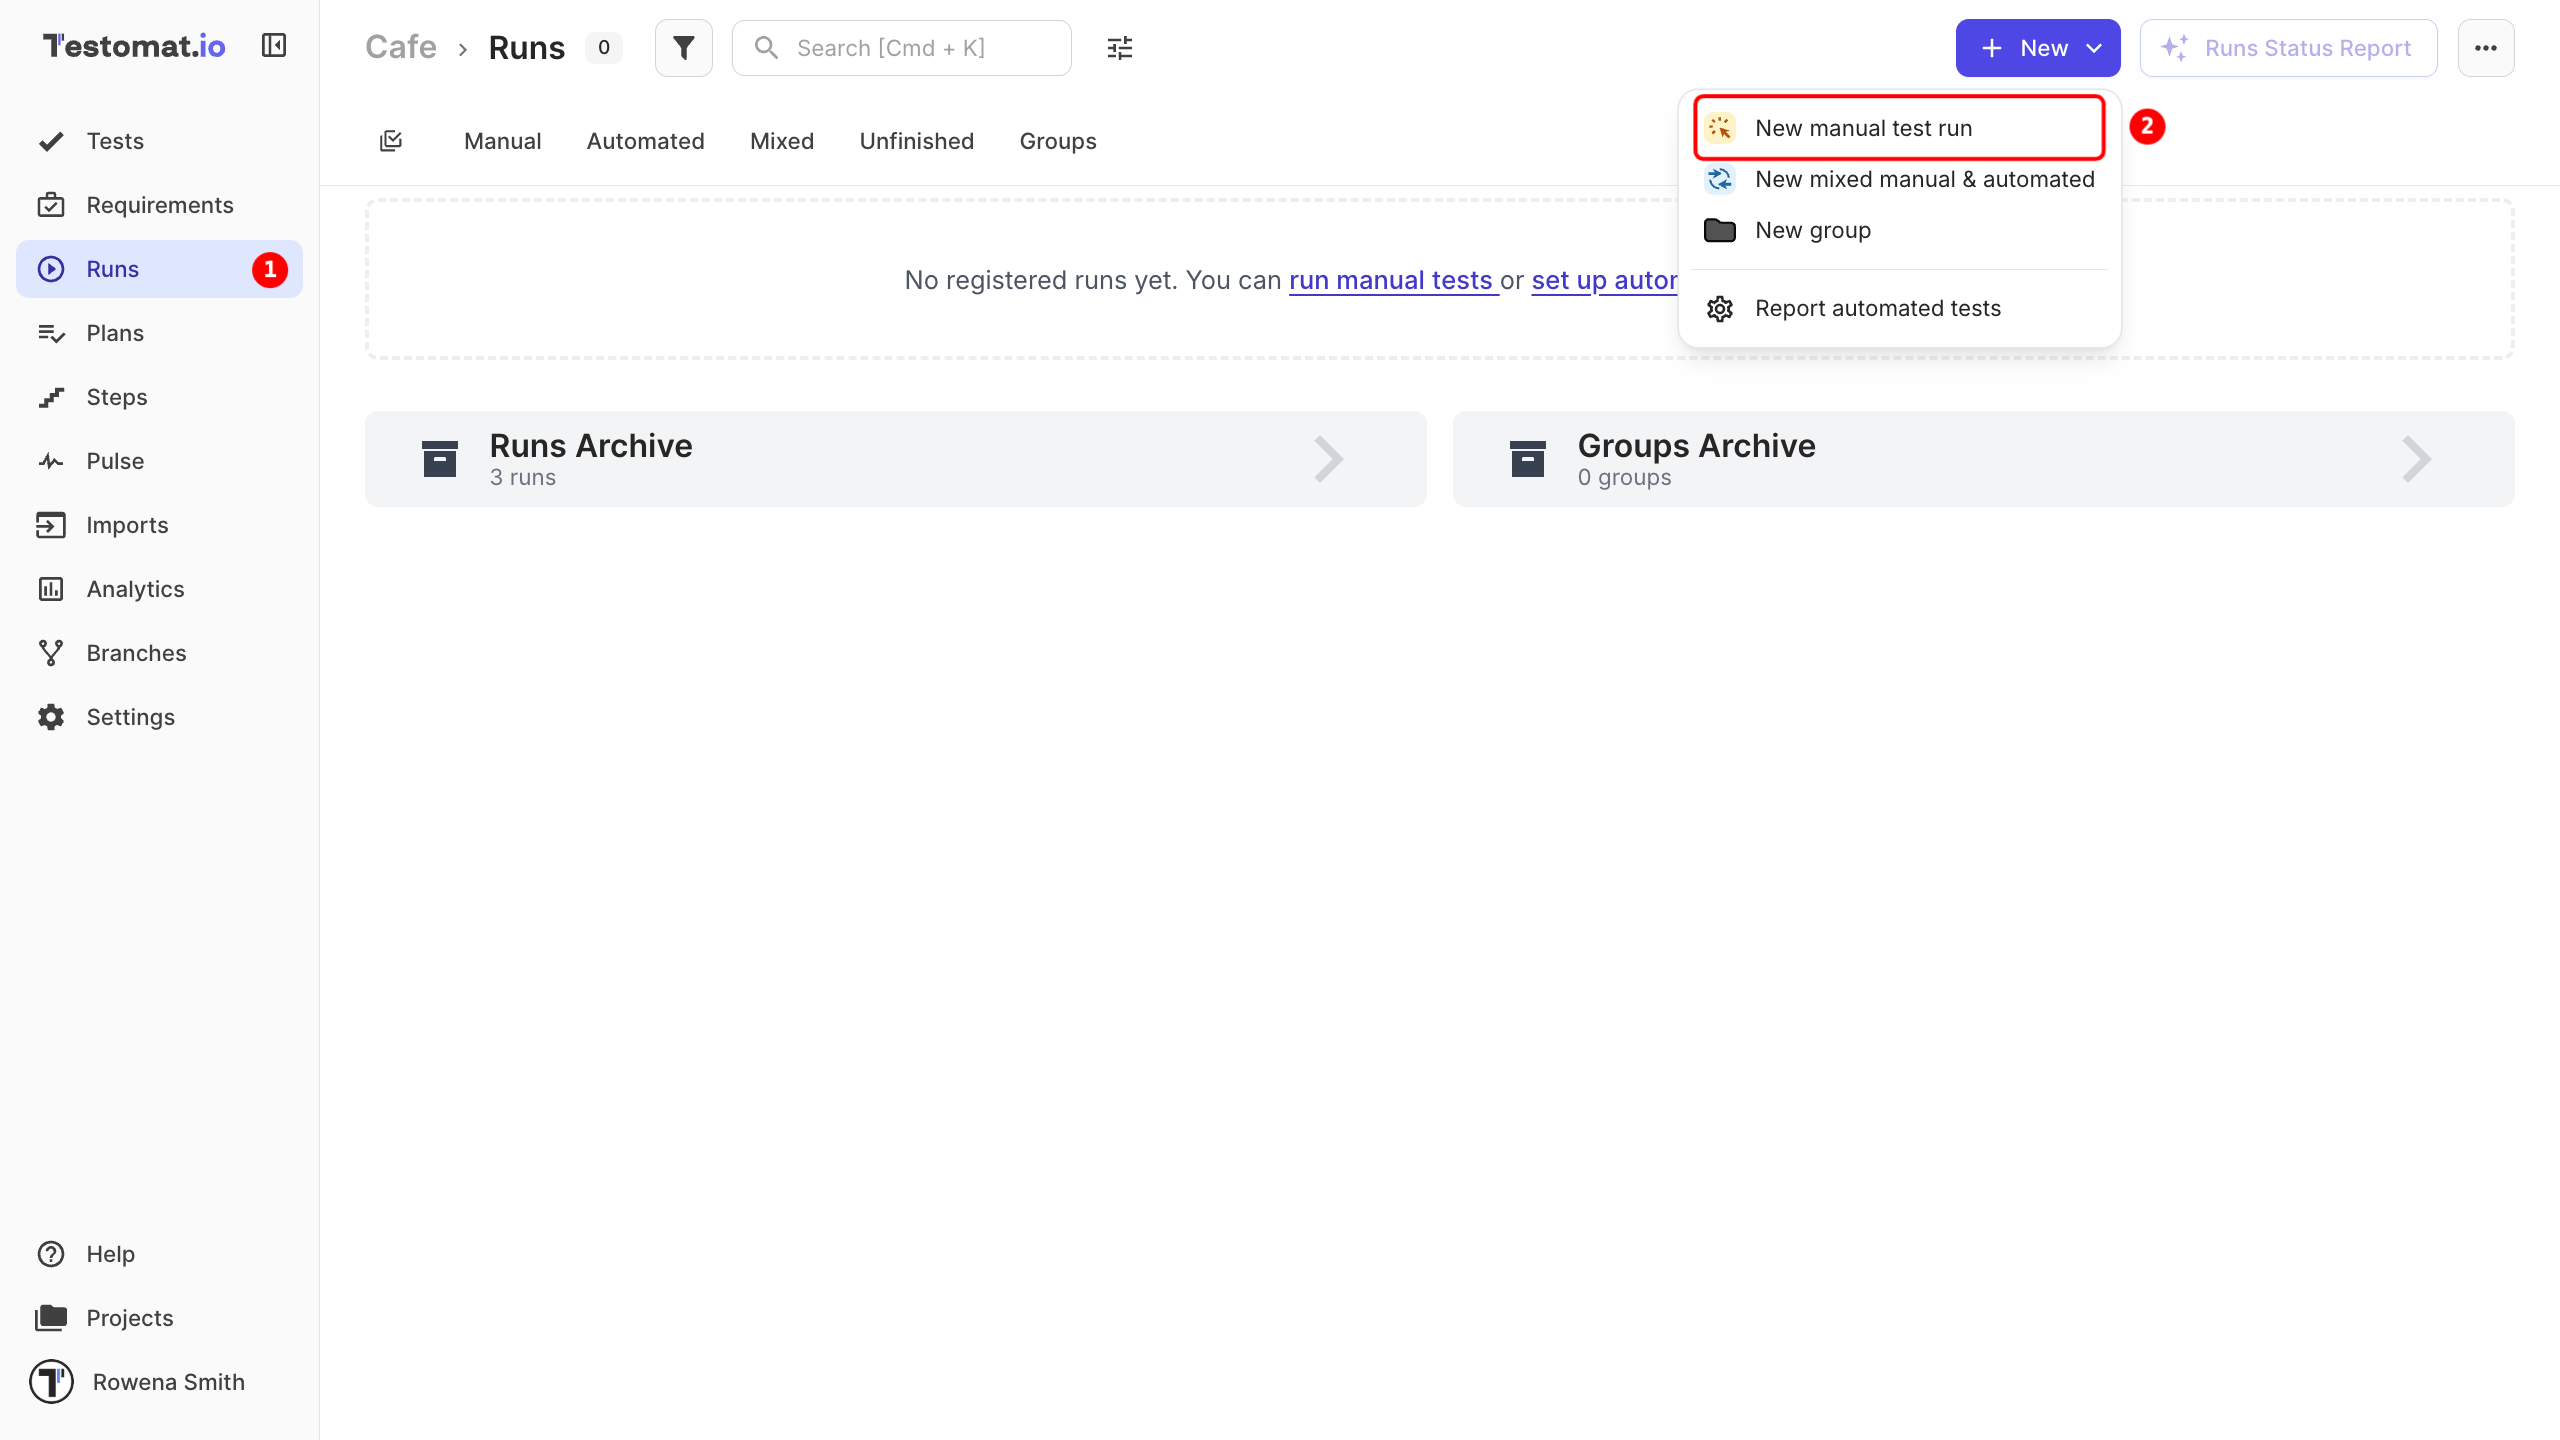
From the ‘Runs’ page - the classic way to create and manage full runs with complete configuration options.
- Go to the Runs tab in the sidebar.
- Click the New button and select New manual test run.
- Enter the run Title.
- Then select All tests, Test plan, Select tests, or Without tests to run tests.
- Click the Launch button to execute the tests.
When the test execution is launched, testers can:
- Mark each test as Passed, Failed, or Skipped.
- Add messages.
- Attach evidence (screenshots, logs, etc.)
- Assign tests to specific team members.
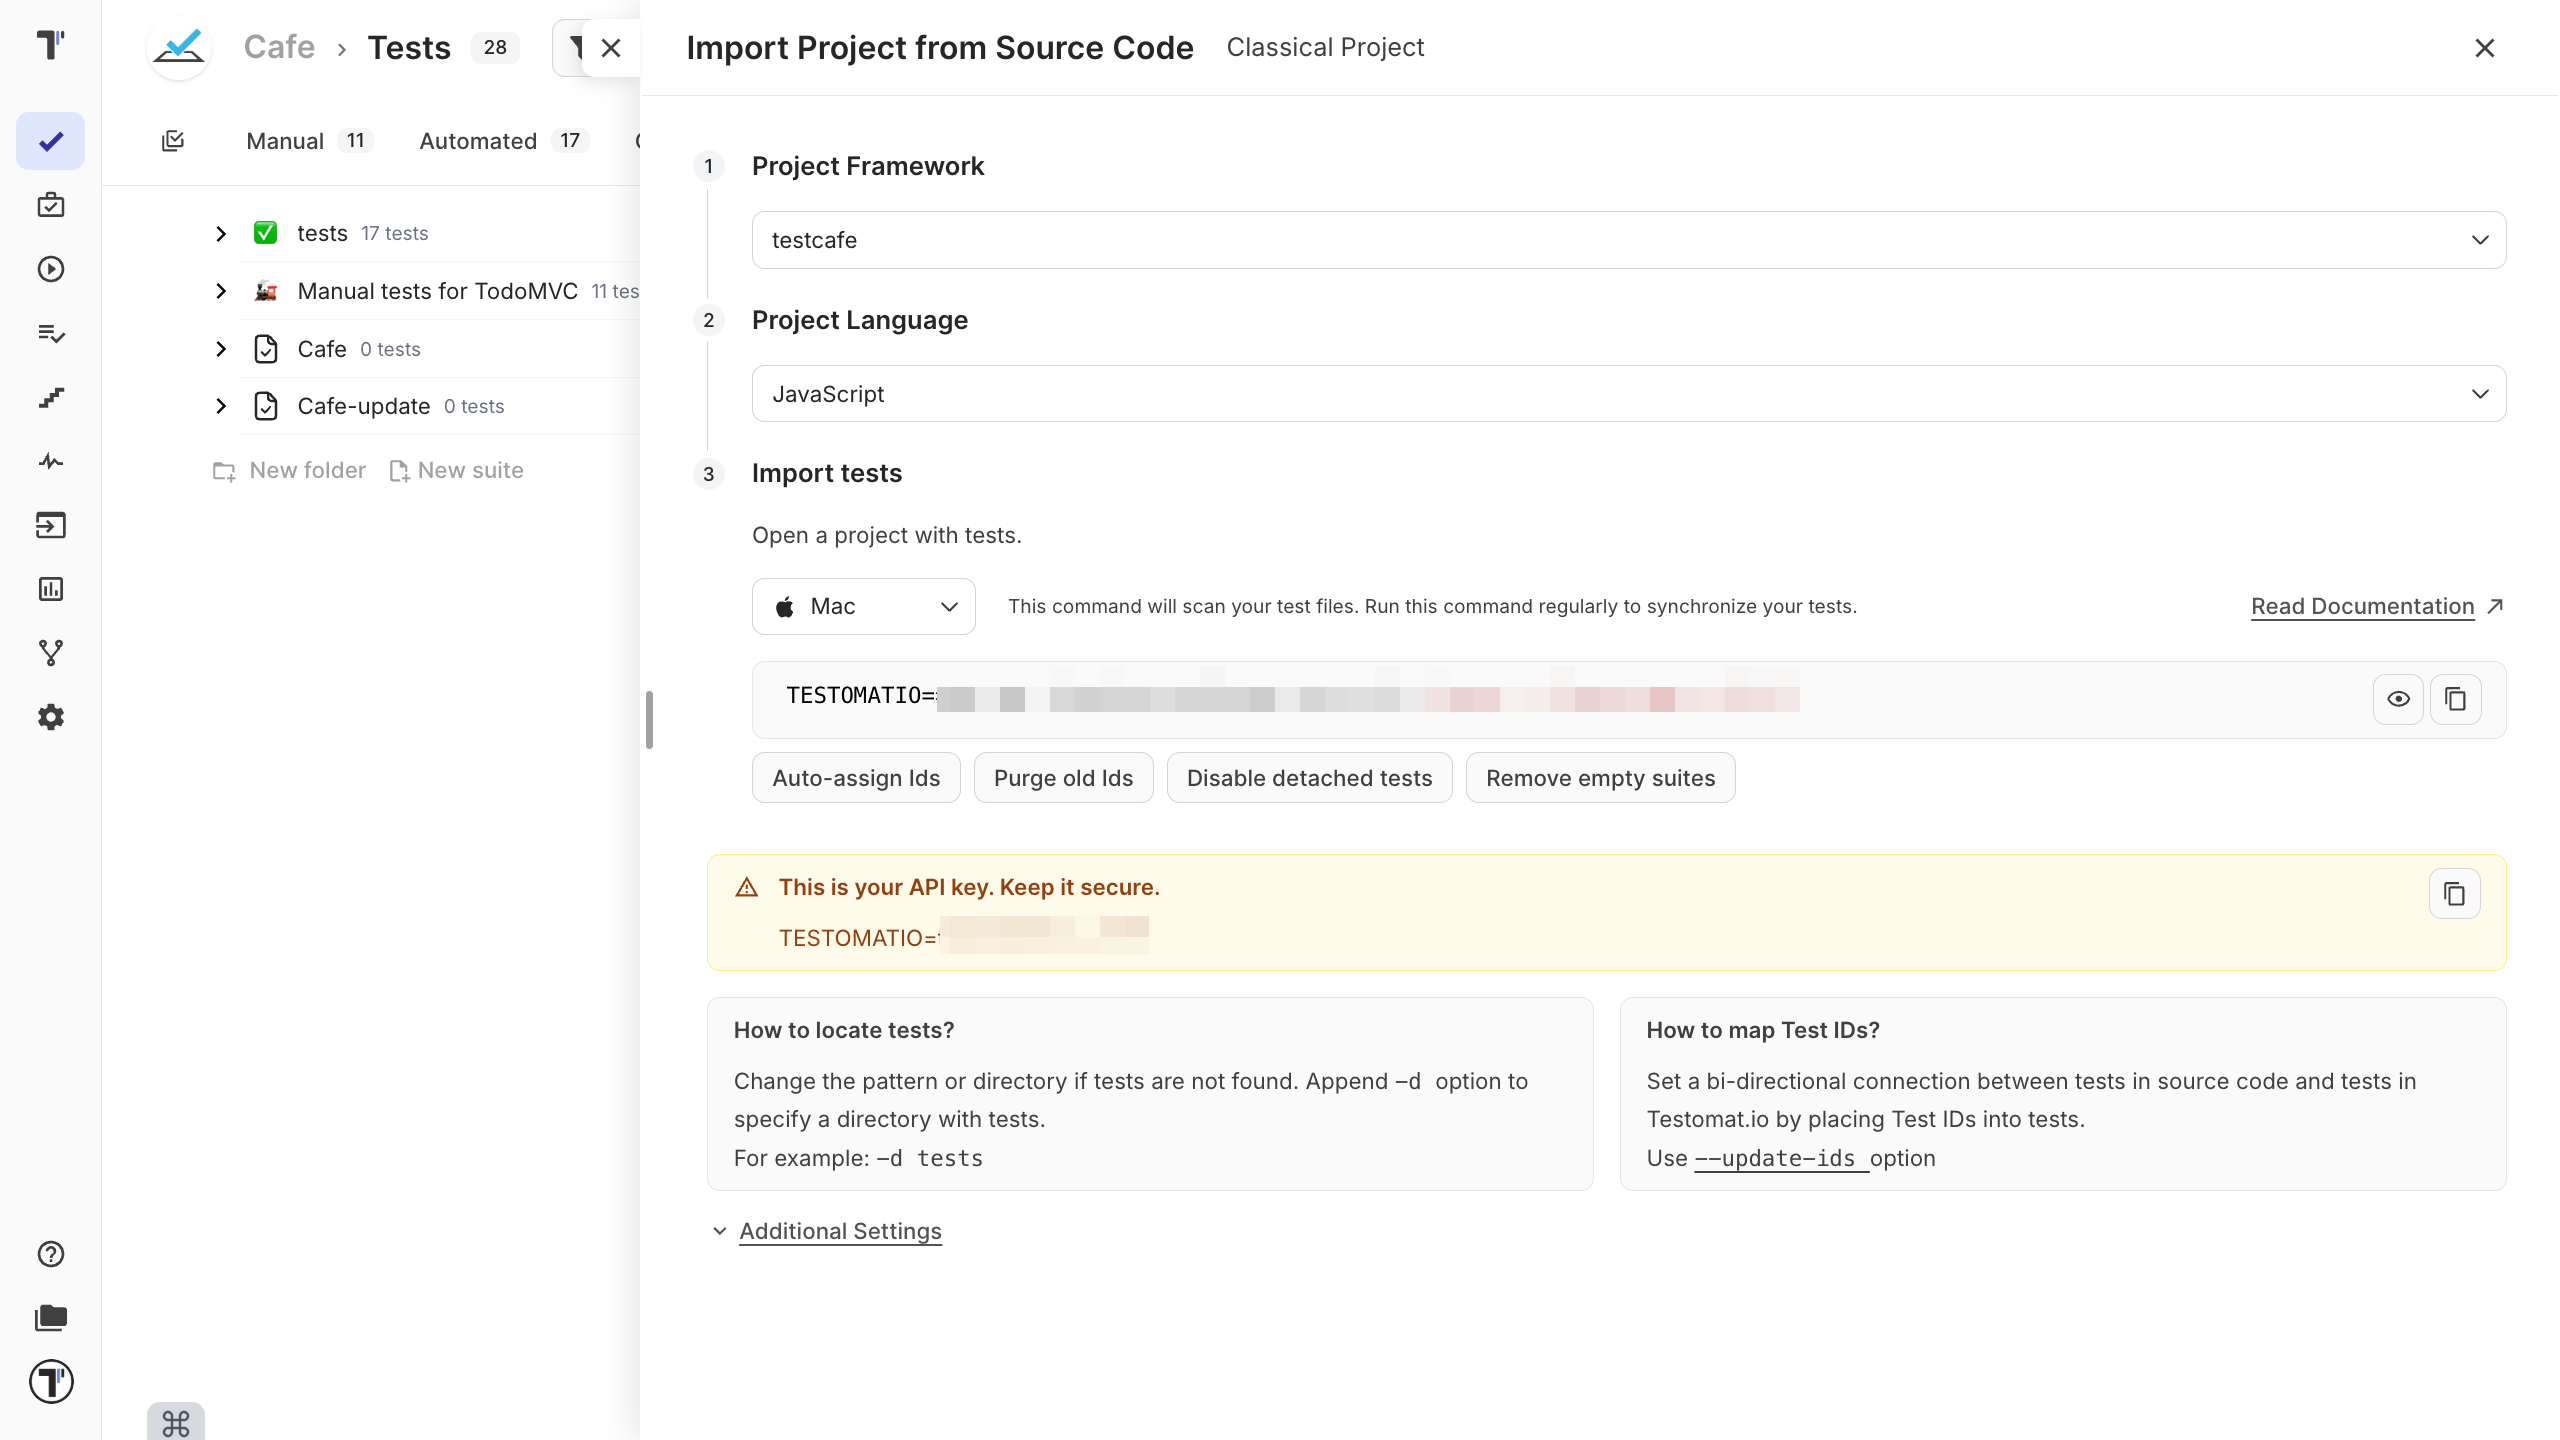
Import Automated Tests
Section titled “Import Automated Tests”Read full article: Import Automated Tests, Import from CSV/XLSX, and Import Tests From TestRail.
To add automated tests to your project, you must import them from the source code, a CSV file, or an existing TestRail suite. To import automated tests, follow these steps:
- Open your project.
- Navigate to the actions (…).
- Click Import automated tests.
Alternatively:
-
Go to the Imports menu.
-
Navigate to the Import dropdown menu.
-
Select an import option:
Import option Description Import from Source Code Imports tests directly from your local project or repository. Import from CSV Imports tests from a CSV file and converts it to one of the available formats. Import from TestRail Imports tests from an existing TestRail suite.
In the Import section, pick the framework, programming language and operating system you are using for testing.
Import via Terminal
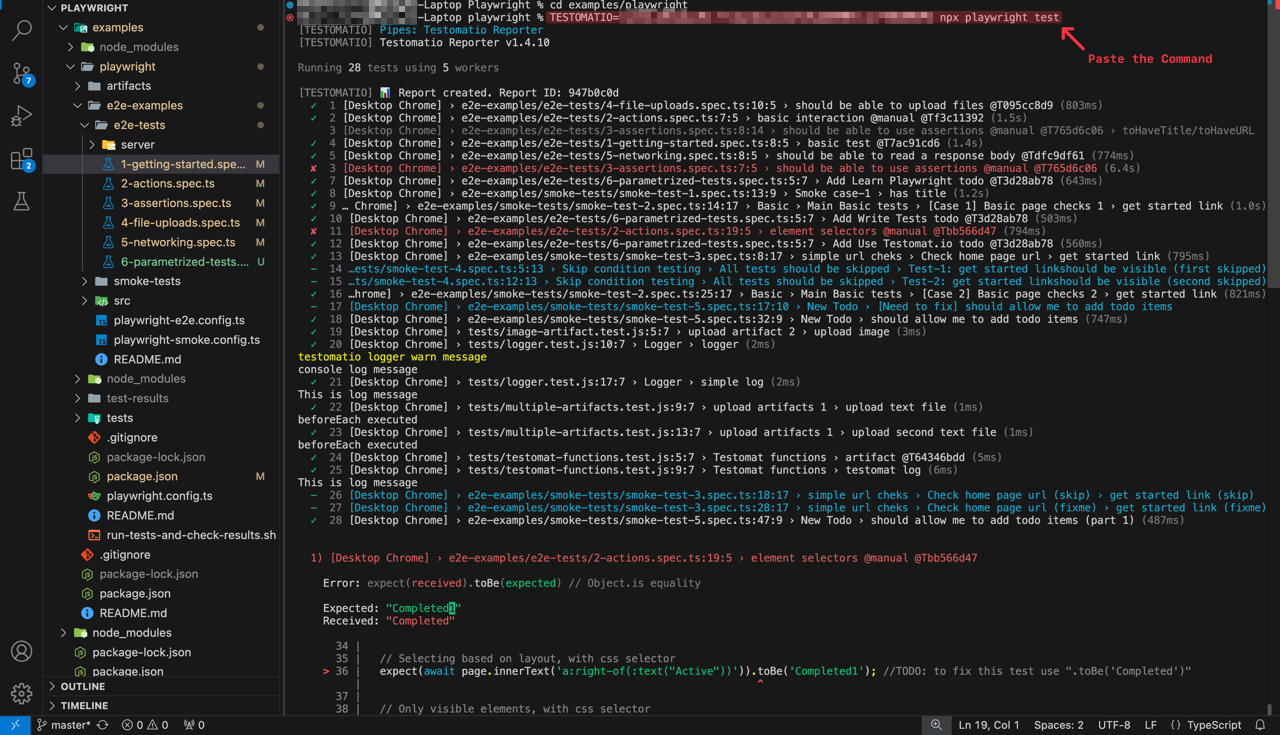
Section titled “Import via Terminal”Testomat.io can store tests from various frameworks. To import automated tests:
- Open a terminal, navigate to the tests folder in your project.
- Copy and execute the import command in a terminal.
- See a report on how many tests were found.
- Reopen the project and see that all tests with their folders and files are shown on Testomat.io.
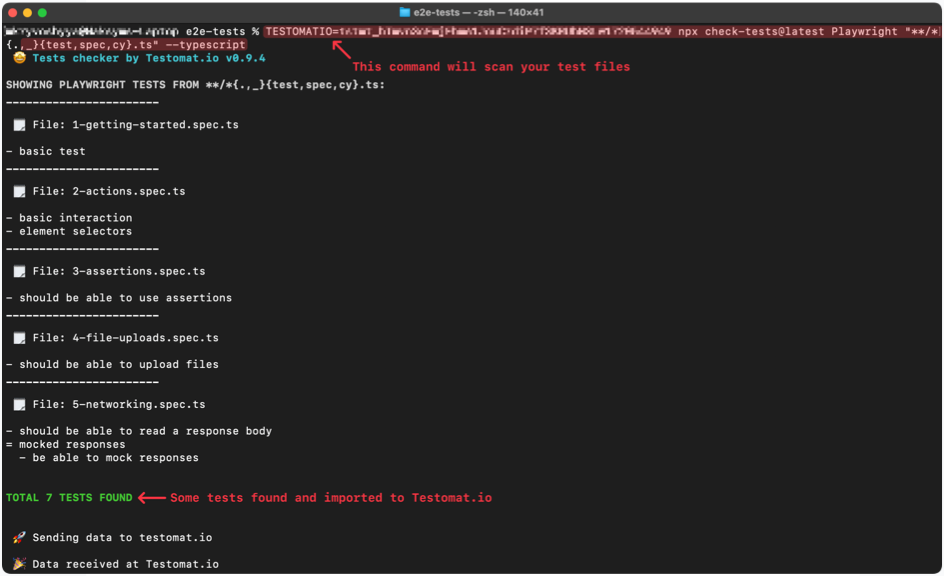
If you don’t see a similar message, please check the command’s API change command parameters so it could find tests. The most common issues with import are different file naming format and/or incorrect directory for import.
Run Automated Tests
Section titled “Run Automated Tests”Read full article: Running Automated Tests.
To start Run Automated Tests:
- Go to the Runs page.
- Navigate to the New dropdown menu.
- Select Report automated tests.
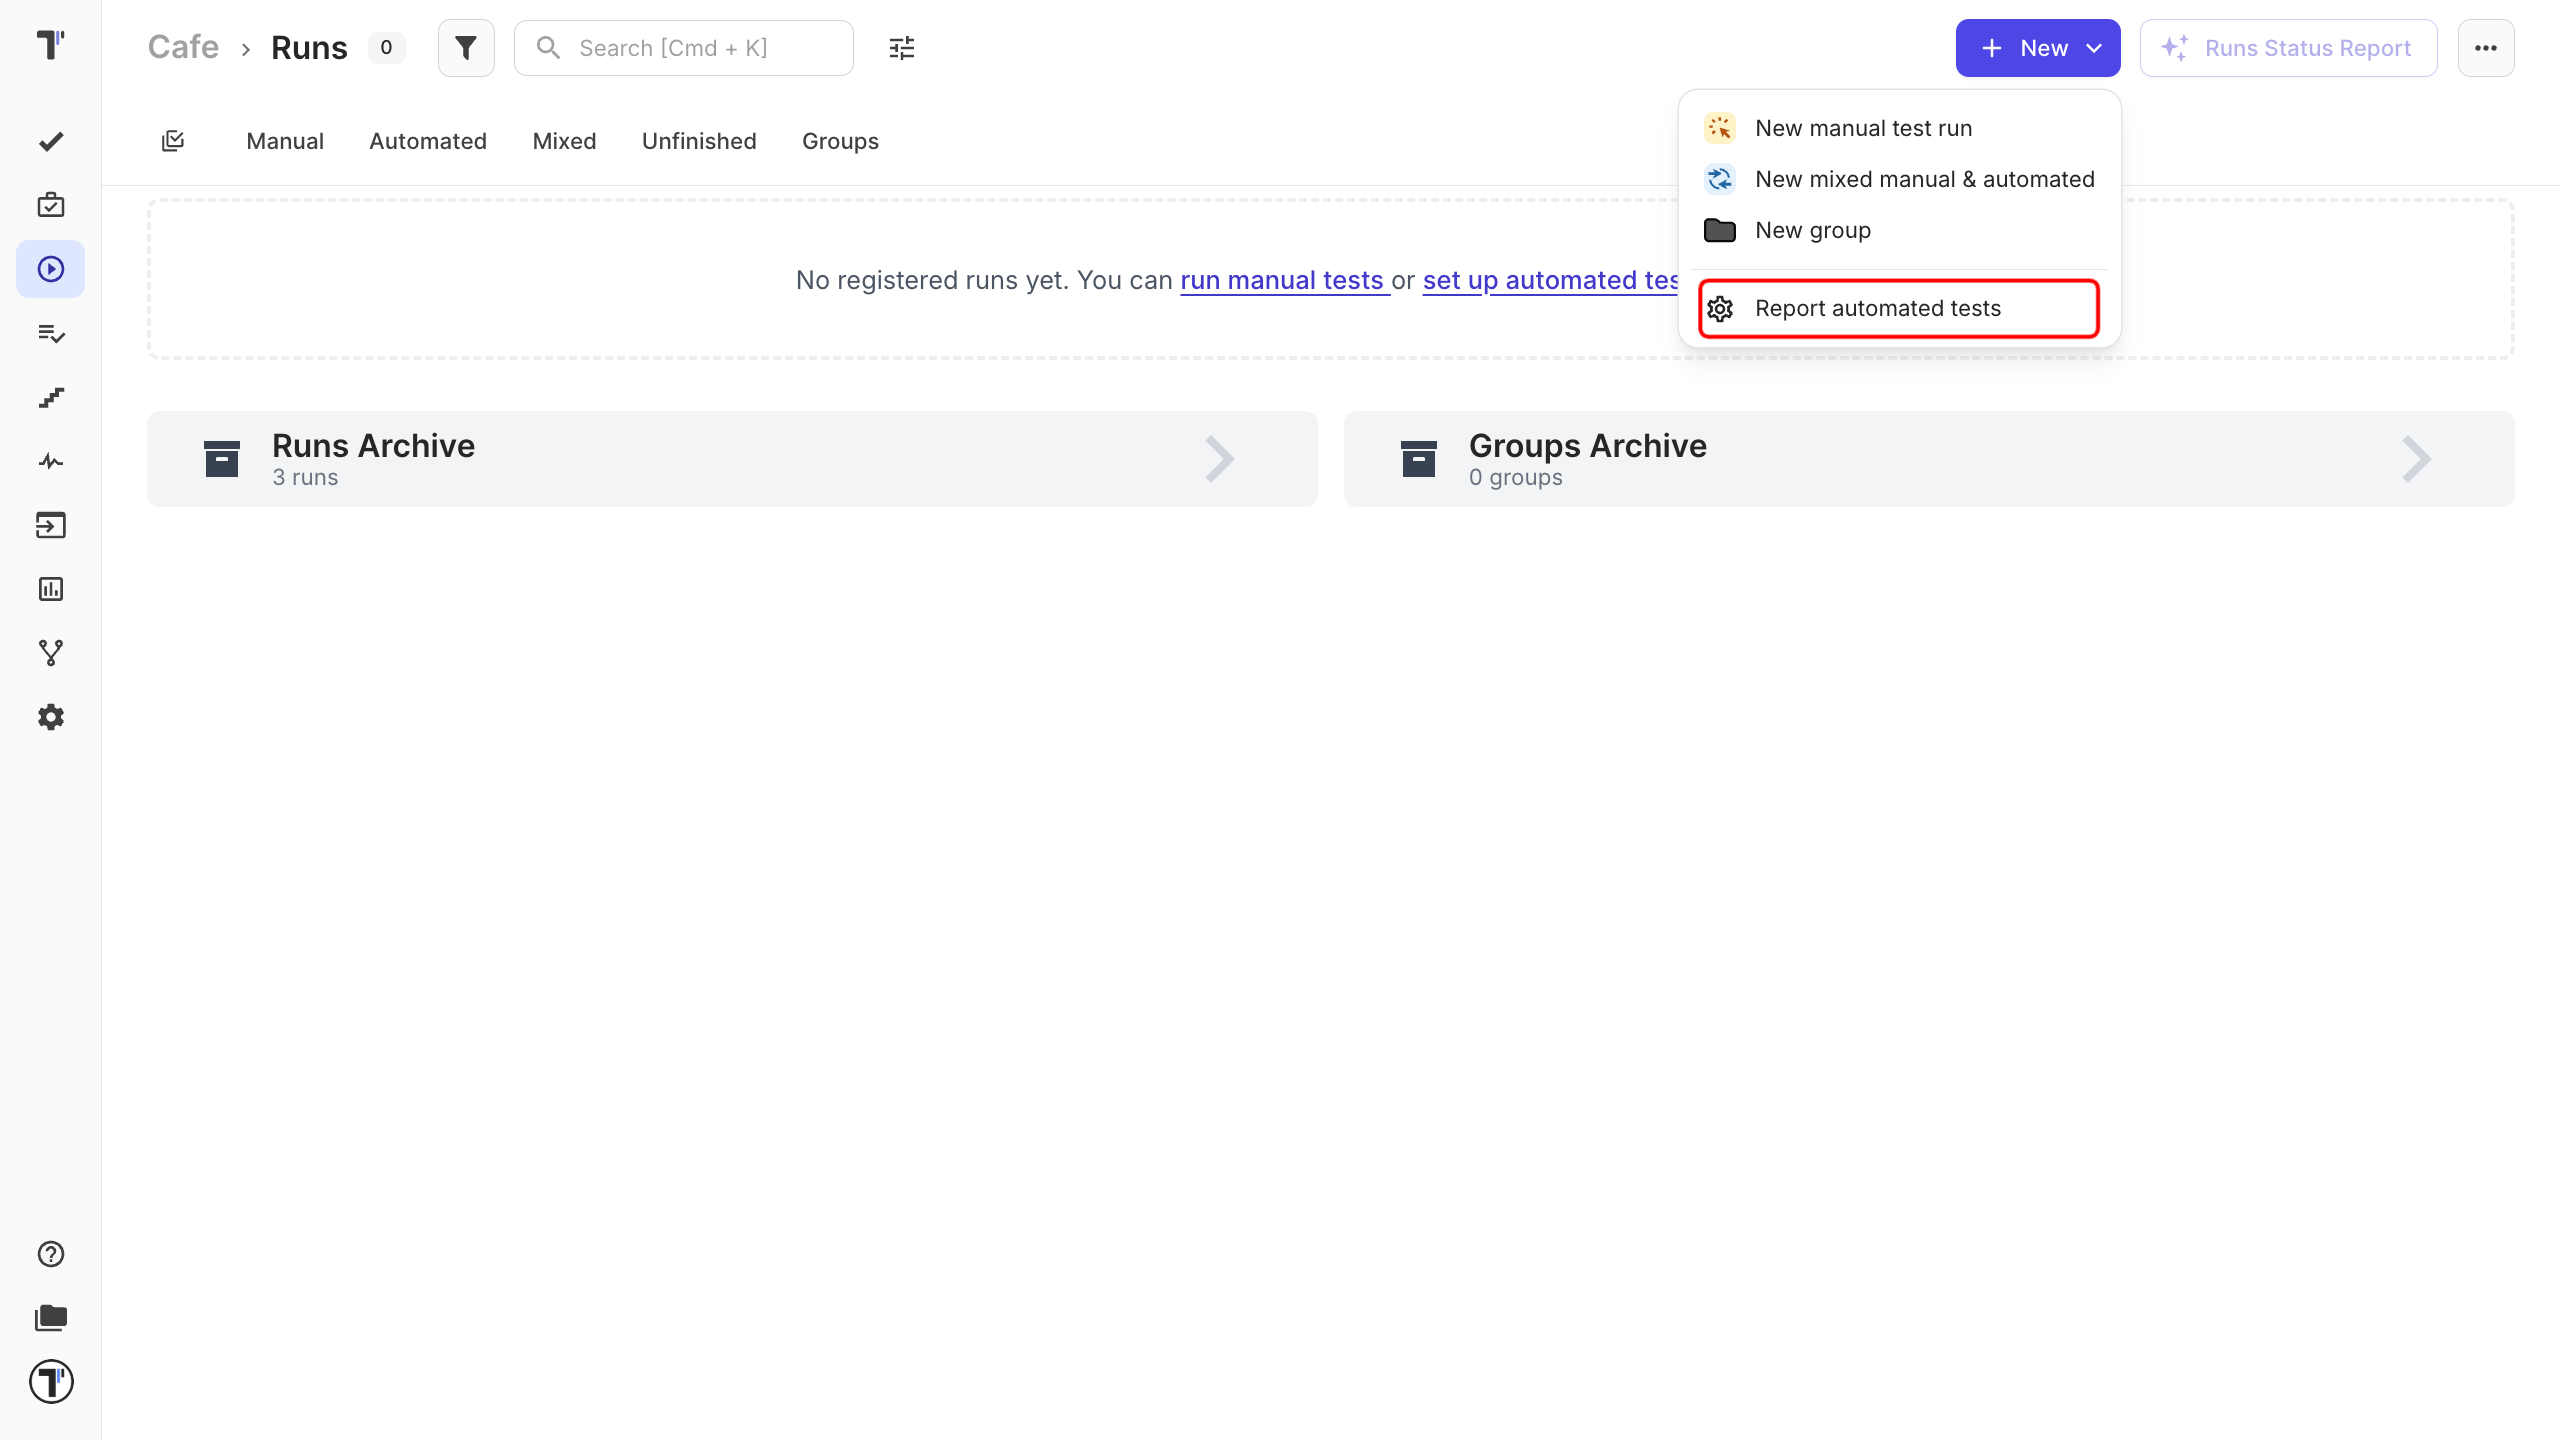
- In the opened window select your framework.
- Testomat.io will generate a terminal command.
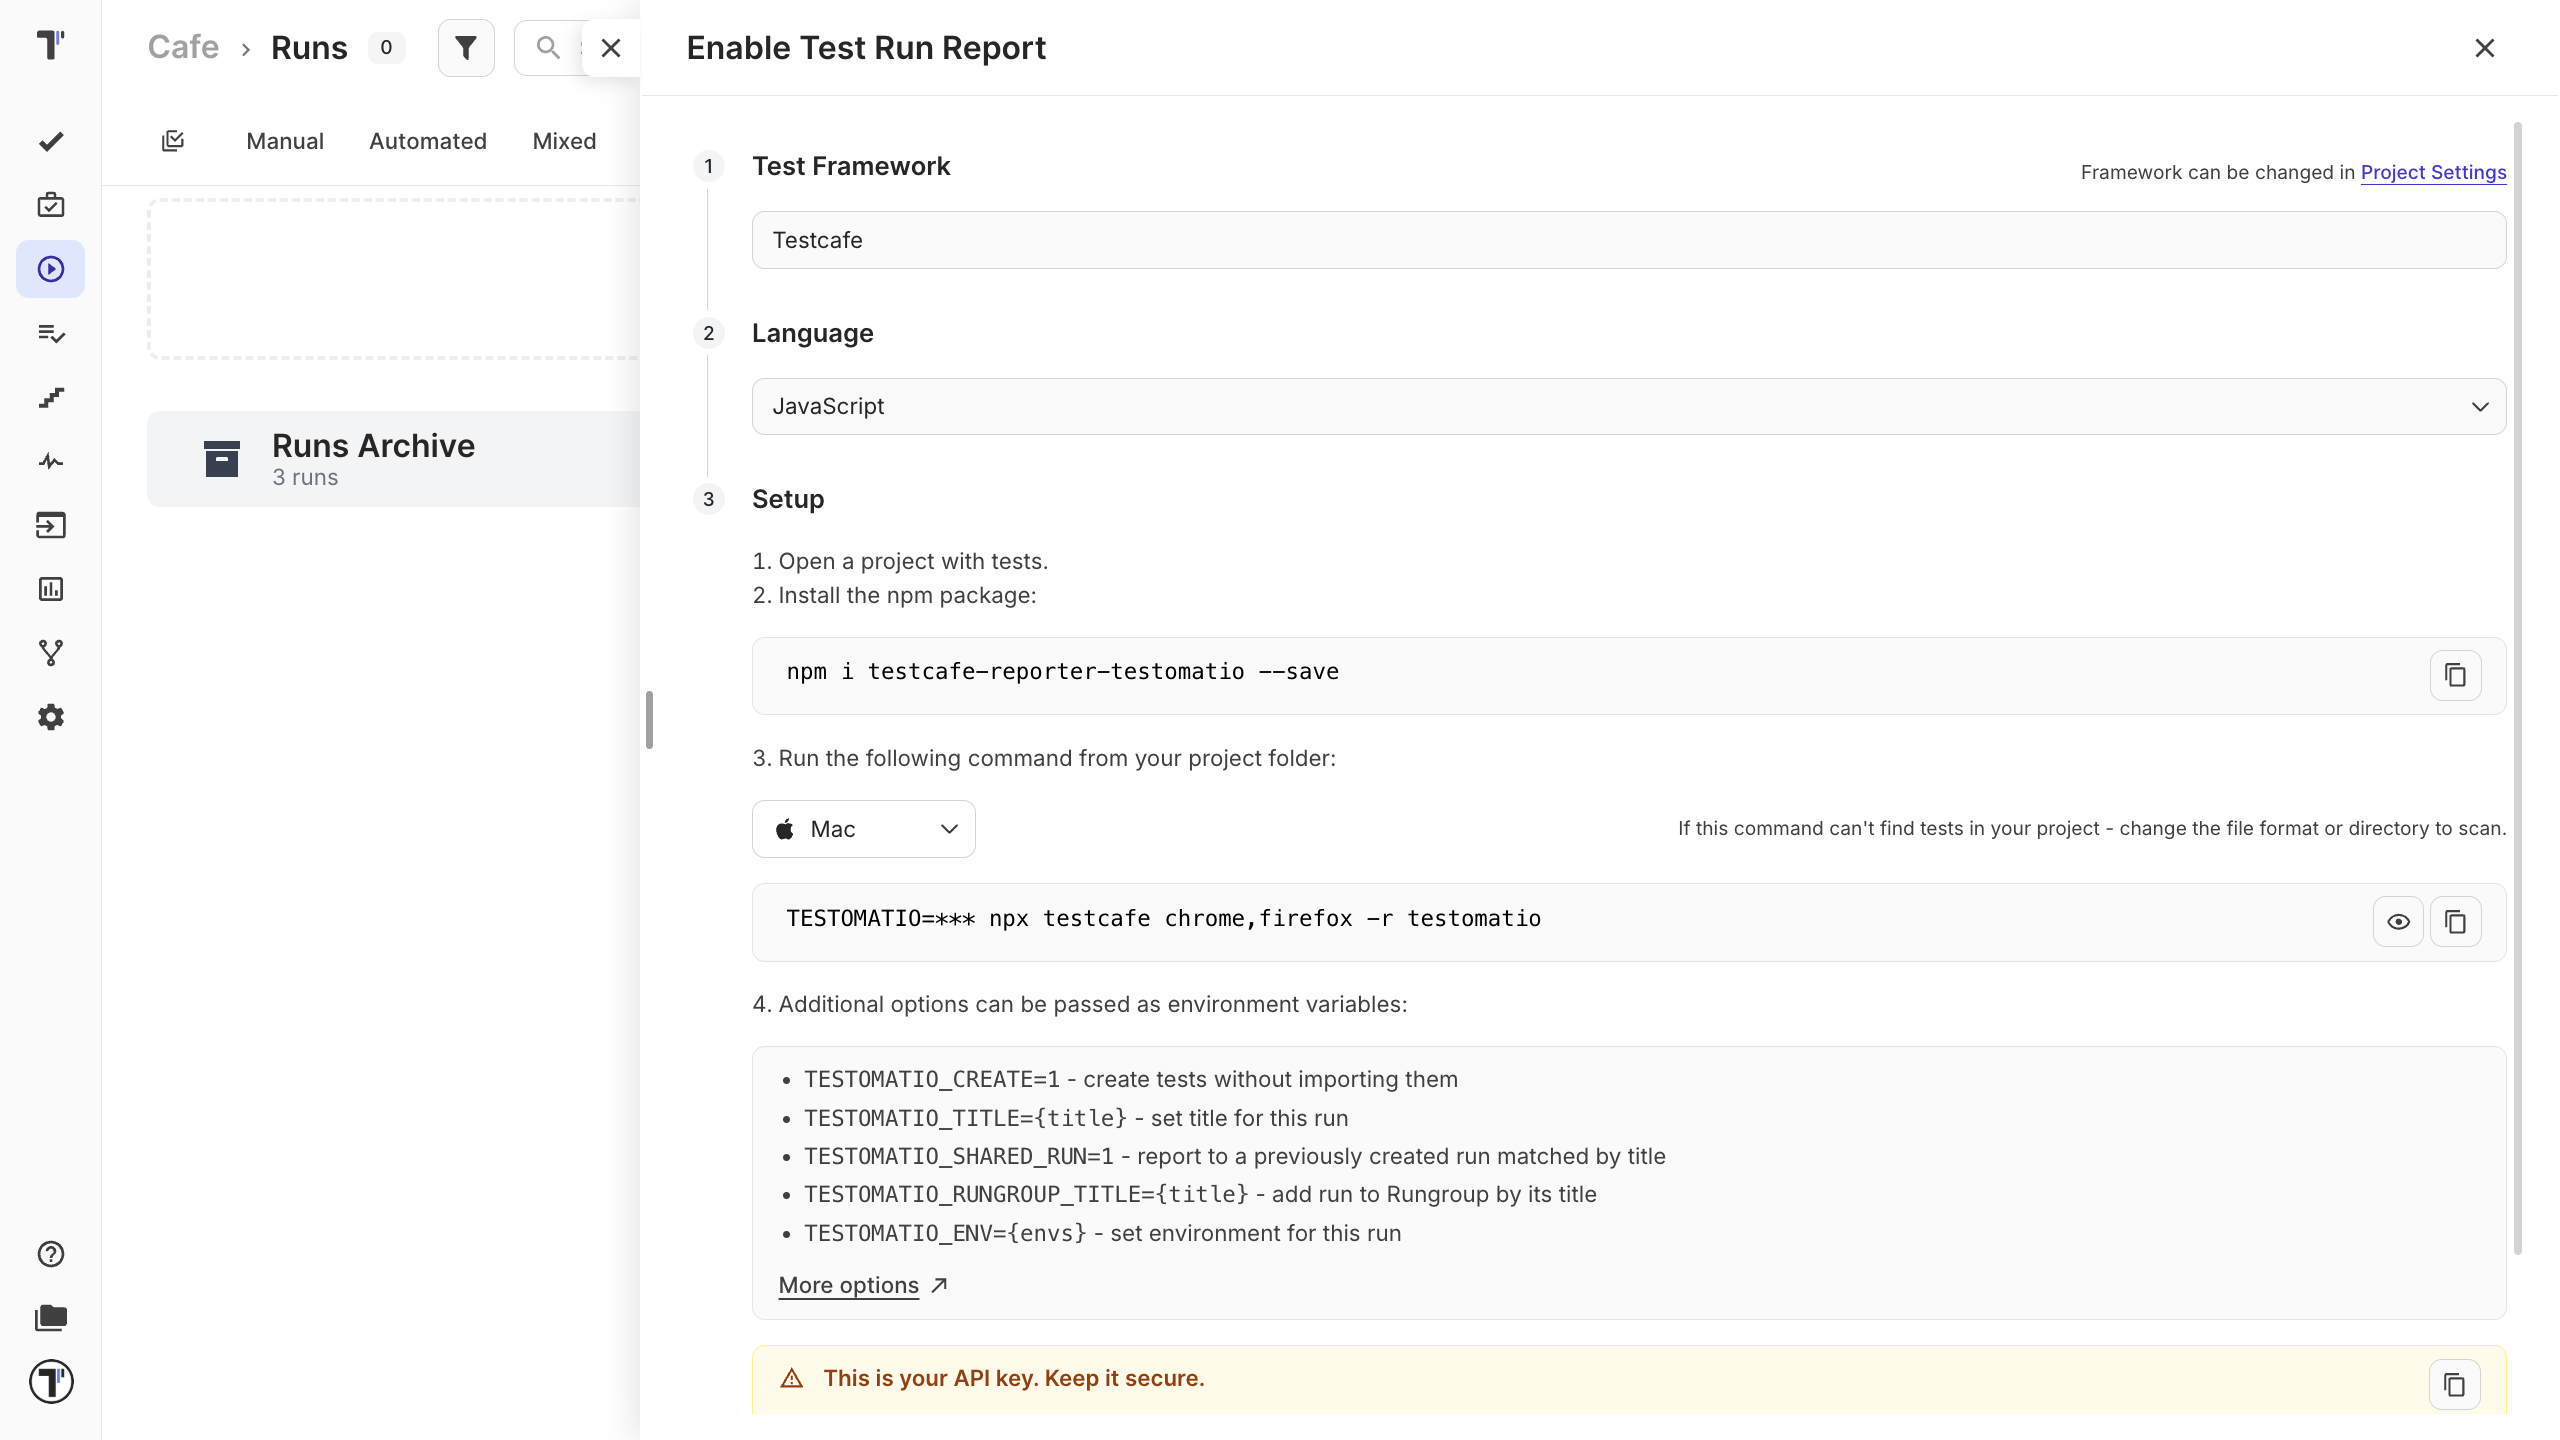
- Start generated commands in your terminal from your project folder.
- A new Test Run will appear on Runs page.
Test Run Report
Section titled “Test Run Report”Read full article: Testomat.io Reporter.
You can use Testomat.io as a test management system or as a rich reporting tool. Each test has its history and a lifecycle, so each test report will be attached to a corresponding test in a project.
To view your test run reports:
- Navigate to the Runs menu.
- Find the information about the completed test run (the duration of the run, the performer, etc.)
- Filter by status, find specific tests by tags, or sort by available methods.
- You can see test results in real-time.
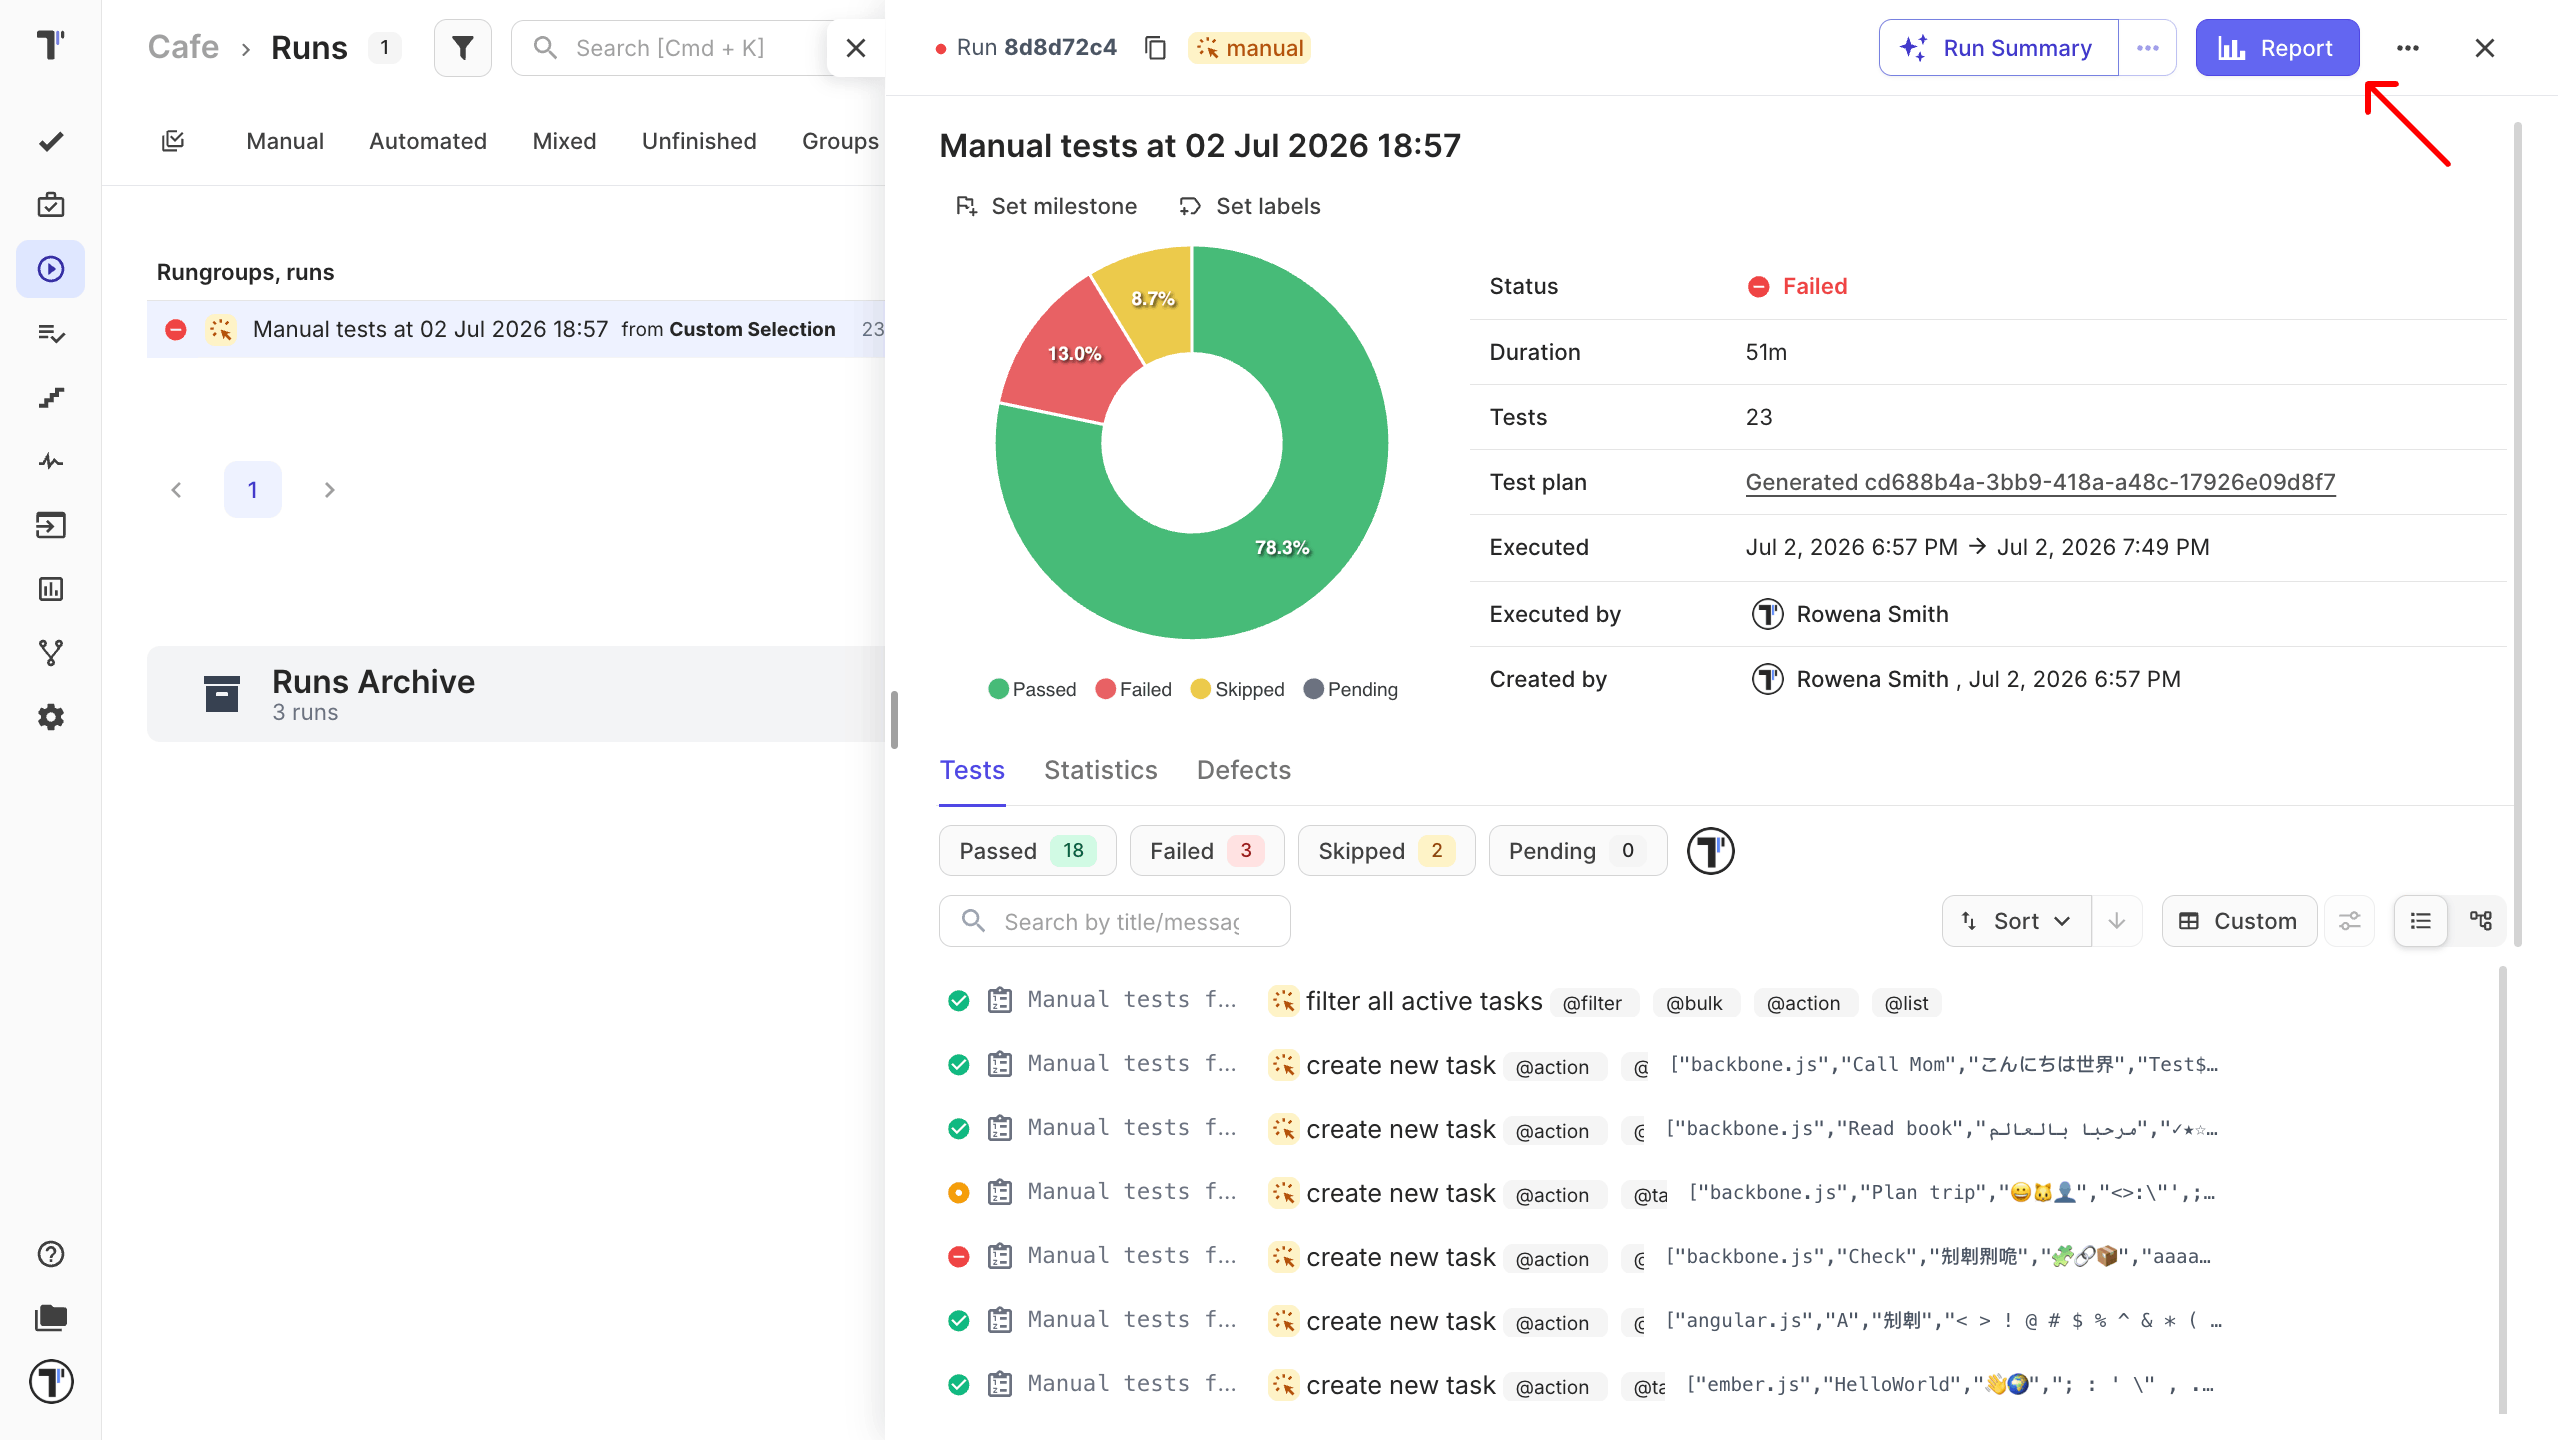
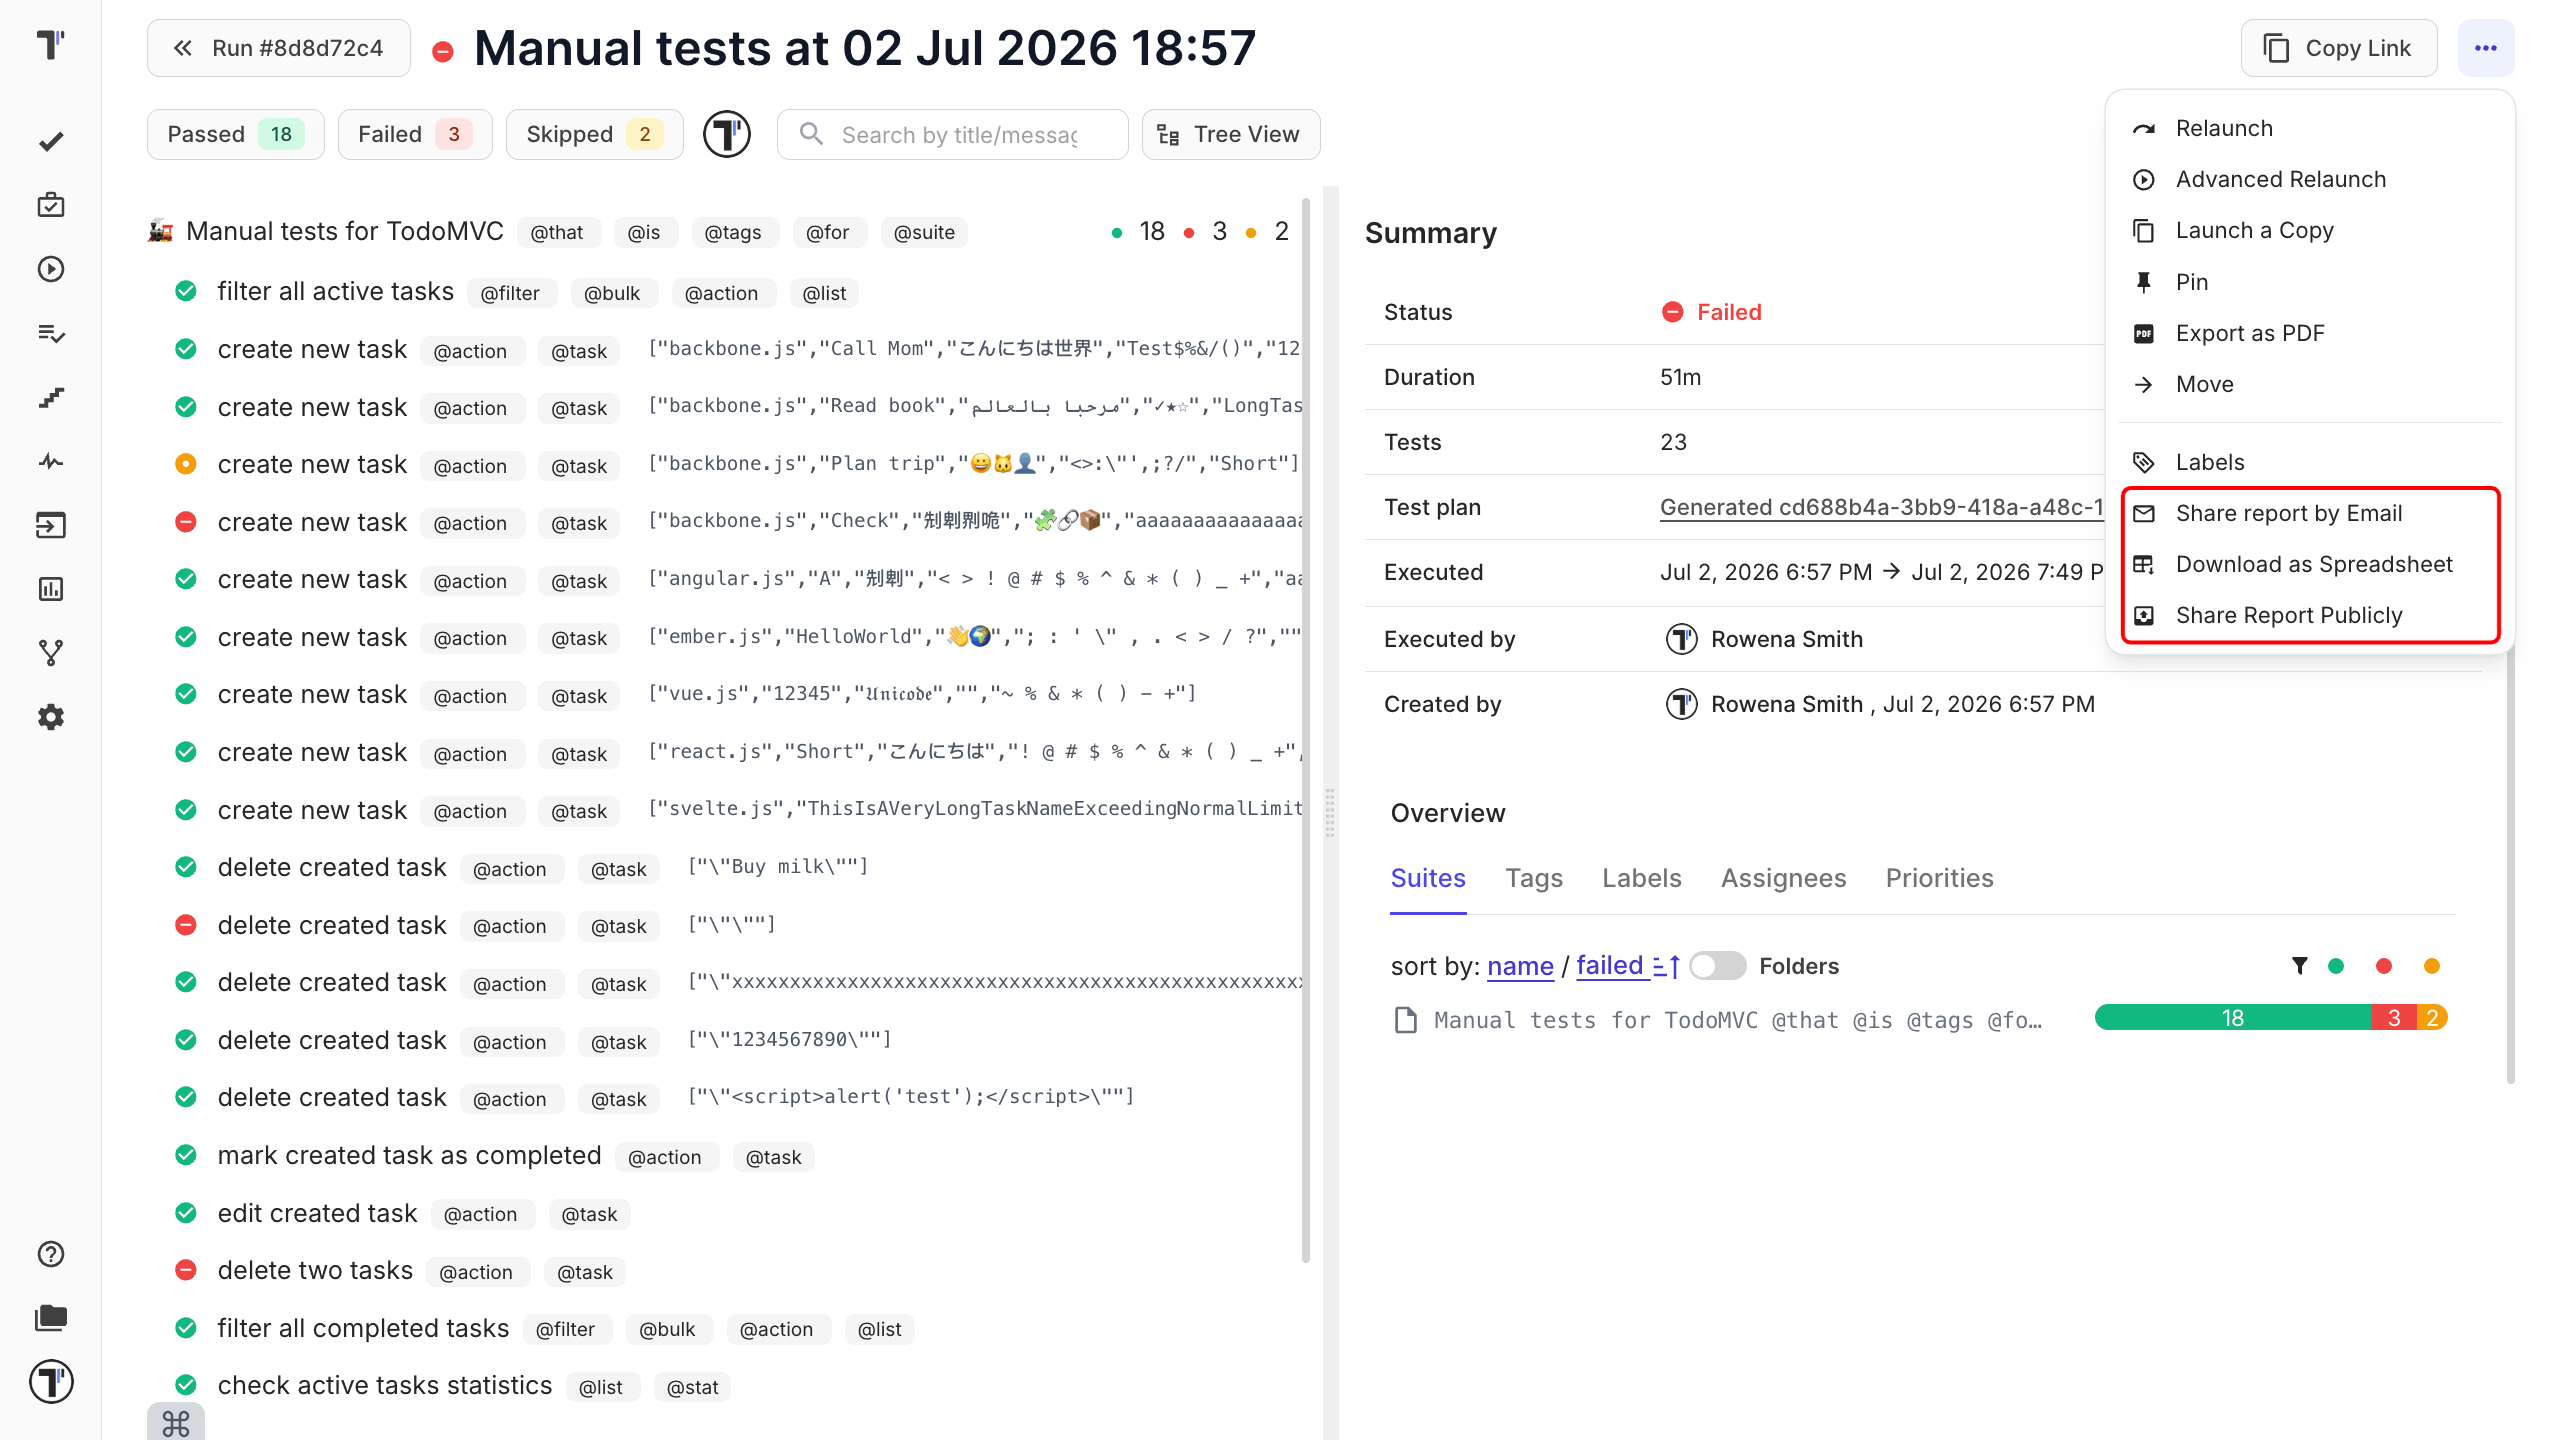
To get a detailed report of the test run, click on the Report button. Share the report with your stakeholders.
Analytics
Section titled “Analytics”Read full article: Analytics.
Testomat.io Analytics provides an extensive overview of testing data by tracking both automated and manual tests. You can visualize trends over time with custom charts, identify automation coverage, monitor failure patterns, and analyze metrics like flaky or slowest tests.
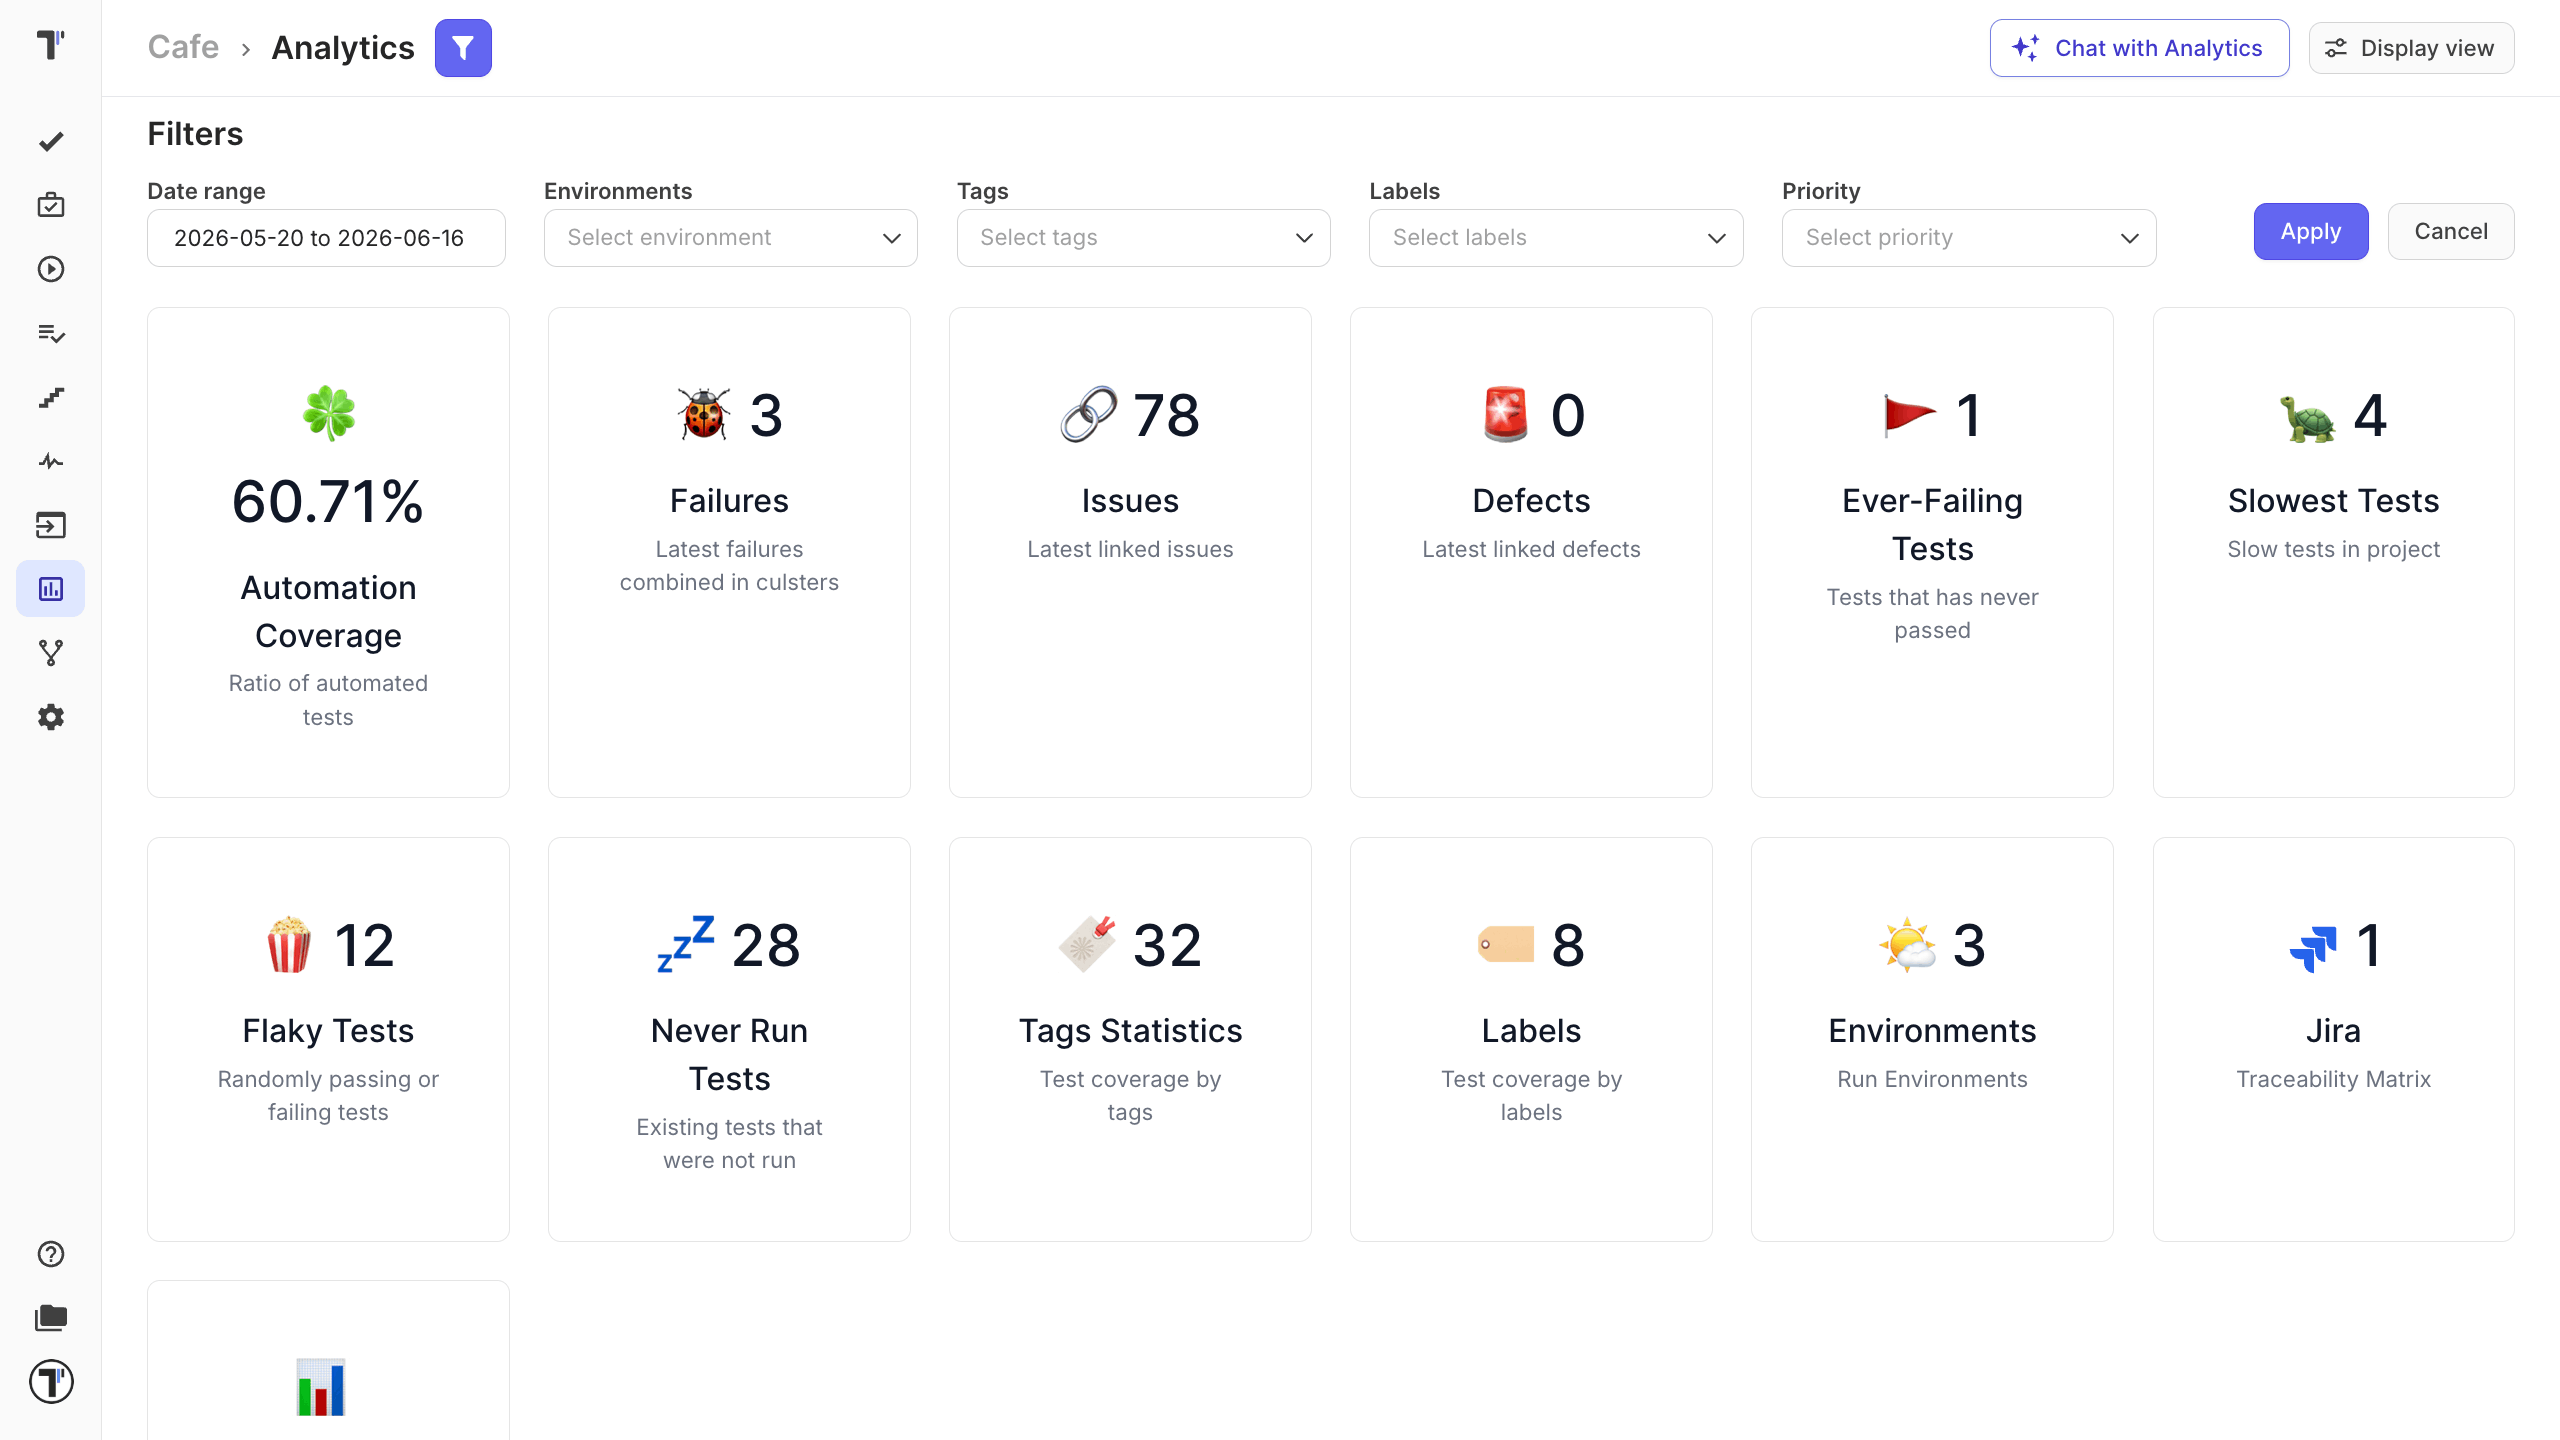
Additional features include a failure board, label, and tag statistics for better team insights, allowing for optimized testing and proactive bug prevention.
Explore more features
Section titled “Explore more features”Learn more: AI-Powered Features and Issues Management Systems.
Once you’re comfortable with the core workflow, you can start using advanced features to help you with your QA process.
A built-in AI assistant can generate new test cases from existing suites or requirements, suggest missing scenarios, summarize project coverage, and write descriptions for undocumented automated tests.
On the integrations side, Testomat.io works out of the box with popular automation frameworks (Playwright, Cypress, Cucumber, and more), CI/CD tools like GitHub Actions, GitLab, and Jenkins, as well as team tools such as Slack and Confluence. In addition, the Jira plugin keeps tests, issues, and results in sync so your whole team can manage testing without leaving the tools they already use.